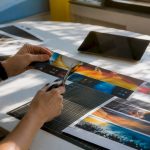
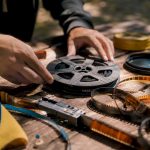
The cinematic video look is the result of deliberate, coordinated choices across motion, light, framing, color, and sound that work together to shape emotion and guide a viewer’s attention, rather than simply recording what’s in front of the lens. Before anything else, fix these three things first:
- Motion and shutter: Shoot at 24 fps with your shutter speed set to roughly double your frame rate (around 1/50s). That motion blur is the single clearest signal audiences associate with film.
- Subject separation: Use a wide aperture (f/1.8–f/2.8) and a longer focal length to pull your subject off the background. Shallow depth of field reads as cinematic almost instantly.
- Motivated lighting: Light your scene with a reason. A window, a lamp, a streetlight — something in the frame or just off it that explains why the light falls where it does.
The difference in practice: a phone pointed at someone talking in a bright room is a video. That same conversation lit by a single window at golden hour, shot at 24 fps on a 50mm lens with the background softly out of focus, is a scene. Cinematic videography is intentional visual storytelling — and technique, not equipment price, is what separates the two.
Key Takeaways
The cinematic video look comes from coordinated technique across motion, light, composition, color, and sound — and consistent execution of a few elements well beats applying every trick at once.
| Point | Details |
|---|---|
| Motion settings first | Shoot 24 fps at 1/50s shutter; this single change delivers the clearest cinematic motion signal. |
| Depth of field and lenses | Wide aperture (f/1.8–f/2.8) with a longer focal length separates subject from background and reads as cinematic immediately. |
| Motivated lighting | Every light source should have a story reason; directional, purposeful light creates depth that flat lighting cannot. |
| Grade subtly | Lift blacks, add midtone contrast, protect skin tones, and use film grain sparingly — avoid extreme color pushes. |
| Kudoflix for finishing | Kudoflix’s browser-based editor provides LUTs, color filters, royalty-free music, and export presets to finish cinematic projects without a download. |
Table of Contents
- What is the cinematic video look, and what builds it?
- What camera settings actually produce a cinematic look?
- How do you use lighting to make footage feel cinematic?
- How does composition and framing shape the cinematic feel?
- How does color grading create a cinematic look?
- What camera movements and blocking choices feel cinematic?
- Why does sound matter as much as the image?
- How do you shoot cinematic footage step by step?
- What does a cinematic post-production workflow look like?
- Common myths about the cinematic look (and quick fixes)
- Films and scenes worth studying frame by frame
- How to finish cinematic videos in Kudoflix
- Story and narrative pacing are what make technique matter
- The cinematic look is a storytelling choice, not a technical achievement
- Kudoflix makes cinematic finishing fast and accessible
- Sources
What is the cinematic video look, and what builds it?
The cinematic look isn’t one effect. It’s a chain of coordinated decisions, and consistent technique matters more than gear cost. Here are the core components, and what each one actually does for your story:
- Composition and framing: Where you place your subject in the frame tells the audience what to feel. A subject pressed to one edge with negative space ahead creates tension. A centered, symmetrical frame signals control or unease. Framing is emotional direction.
- Lighting: Directional, motivated light creates depth and mood. Flat, even light flattens both. The difference between a scene that feels alive and one that feels like a corporate training video is almost always lighting.
- Camera movement: A slow push toward a character during a confession feels intimate. A locked-off wide shot during the same moment feels cold and observational. Movement is a storytelling choice, not a technical flex.
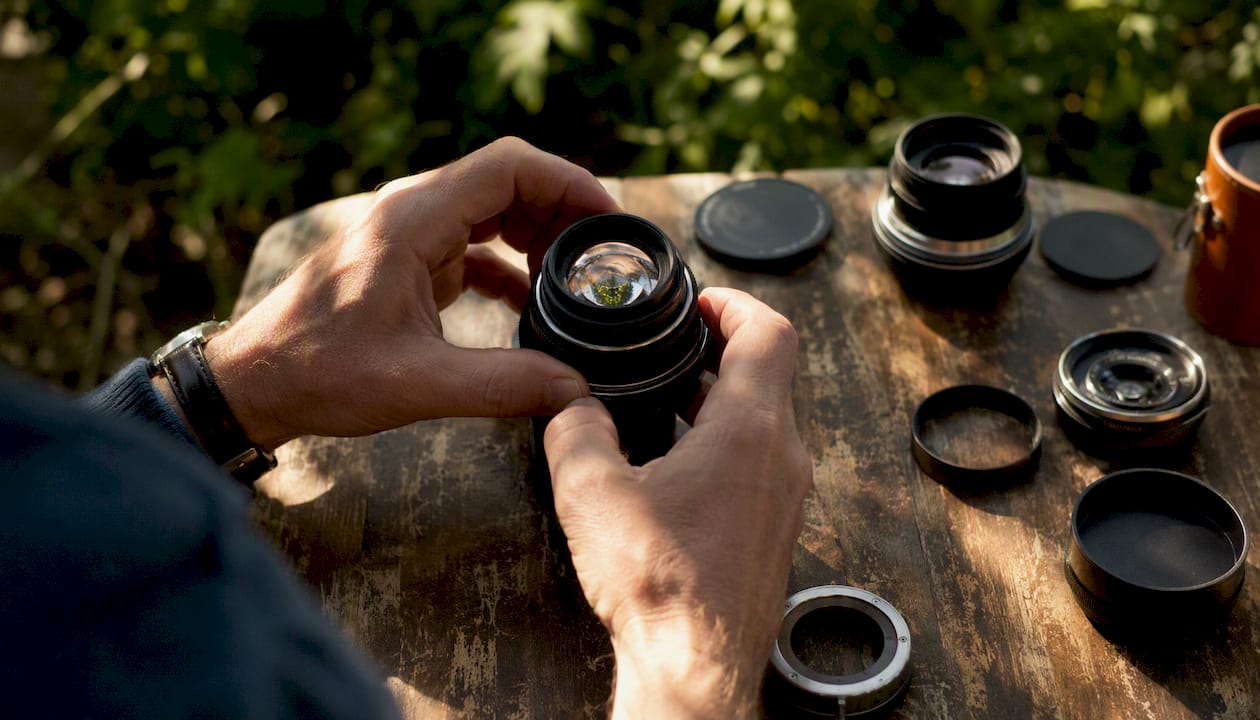
- Depth of field and lenses: Shallow depth separates subject from world and focuses attention. Deeper depth of field can make a scene feel documentary or overwhelming. The lens choice shapes the emotional relationship between viewer and subject.
- Aspect ratio: 2.39:1 (anamorphic widescreen) signals cinema. 16:9 signals television. 1.85:1 sits between them. Ratio alone doesn’t make footage cinematic, but it sets a visual expectation.
- Color and grading: Color is mood. A warm, slightly desaturated grade reads as nostalgic. A cool, high-contrast grade reads as tense or modern. Grading reinforces what the lighting and story already say.
- Sound and pacing: Great images with bad audio feel amateur. Sound design and music carry as much emotional weight as the visuals. Pacing — how long you hold a shot, when you cut — controls tension and rhythm.
Pro Tip: If you’re working with a limited budget, prioritize lighting first, then motion settings (fps and shutter), then composition. These three deliver the biggest perceived upgrade before you touch a single piece of expensive gear.
What camera settings actually produce a cinematic look?
Exact settings matter more than most beginners expect. Here’s a compact reference:
| Setting | Recommended Value | Why It Matters |
|---|---|---|
| Frame rate | 24 fps (drama) / 30 fps (other) | 24 fps motion blur is the standard film look |
| Shutter speed | ~2× frame rate (1/50s at 24 fps) | Creates natural motion blur per the 180-degree rule |
| Aperture | f/1.8–f/2.8 (subject separation) | Shallow depth of field; adjust for exposure |
| ISO | As low as possible; use ND filters first | Keeps noise low; preserves dynamic range |
| White balance | Manual, set on location | Prevents color shifts between shots |
| Color profile | Flat/log if available | Preserves dynamic range for grading |
Shooting at 24 fps with the 180-degree shutter rule is the clearest technical signal audiences associate with film motion. Most cameras default to 1/50s at 24 fps, which is exactly right.
Gear priorities:
- Must-haves: A lens that opens to at least f/2.8, ND filters (to control exposure without raising shutter speed), and some form of stabilization (a tripod, a gimbal, or a shoulder rig).
- Nice-to-haves: A follow focus, a larger sensor body (Micro Four Thirds or larger), an external monitor, and a cinema-style prime lens set.
Pro Tip: ND filters are the most underrated purchase for cinematic shooting. Without them, you’re forced to close your aperture or raise your shutter speed in bright light, which kills both your depth of field and your motion blur. A 3-stop and a 6-stop ND cover most outdoor situations.
How do you use lighting to make footage feel cinematic?
Cinematic lighting is directional and motivated. That means every light source in your frame should feel like it comes from somewhere real: a window, a practical lamp, a fire, a neon sign. A key light with purposeful shadows and practicals in-frame adds depth and narrative cues that flat, even lighting simply cannot.
Three starter setups:
- Single soft key (window light): Place your subject at a 45-degree angle to a large window. Use a reflector on the opposite side to lift shadows slightly. This is the fastest way to get a motivated, film-quality look with zero equipment cost.
- Two-light contrast setup: One large soft key from the side, one rim light from behind and opposite. No fill. The shadow side goes dark, creating depth and separation. Works for dramatic or moody scenes.
- Three-point with practical: Key light, rim light, and a practical (a lamp or candle visible in frame). The practical justifies the key and adds warmth and depth to the background.
On-set lighting checklist:
- Identify the motivated light source before you set up anything
- Match your key light color temperature to that source
- Check for unwanted reflections in eyes, glasses, and surfaces
- Confirm your background has at least one light element (a window, a lamp, a highlight) to add depth
- Avoid lighting your subject and background at the same intensity — separation requires contrast
Pro Tip: Available light is almost always more cinematic than a poorly placed artificial light. Before you set up a single LED panel, walk the location and find the best natural light. Then use your artificial lights to supplement or control it, not replace it.
How does composition and framing shape the cinematic feel?
Composition is where most beginners leave the most cinematic value on the table. The rules aren’t arbitrary — they’re shortcuts to frames that feel intentional.
- Rule of thirds: Place your subject’s eyes on the upper horizontal third line. Leave space in the direction they’re looking. This single adjustment makes most frames feel more considered.
- Leading lines: Roads, fences, hallways, and sight lines pull the viewer’s eye toward your subject. Use them deliberately, not by accident.
- Negative space: Empty space around a subject isn’t wasted — it communicates isolation, scale, or anticipation. A character small in a wide frame feels vulnerable. Fill the frame with their face and they feel powerful.
- Foreground layering: Placing something slightly out of focus in the foreground (a branch, a doorframe, a shoulder) adds depth and makes the frame feel three-dimensional.
- Eye-line room: Give characters space in the direction they’re looking. Cutting that space tight creates claustrophobia — use it intentionally.
- Center/symmetry: Symmetrical, centered framing reads as deliberate and controlled. Wes Anderson uses it for stylized detachment. Use it as a choice, not a default.
Aspect ratio in practice:
- 16:9: Standard for YouTube, streaming, and most digital delivery. Cinematic when everything else is right.
- 2.39:1: Anamorphic widescreen. Strong cinematic signal. Adds black bars that audiences associate with film. Use it when you want that association, not just to add bars in post.
- 1.85:1: A softer widescreen. Common in theatrical releases. Less aggressive than 2.39:1.
Before/after framing checklist:
- Is there a clear subject and a clear background separation?
- Does the frame have a foreground, midground, and background element?
- Is there a leading line or compositional anchor pulling the eye?
- Does the negative space serve the emotion of the scene?
- Is the aspect ratio consistent across the sequence?
How does color grading create a cinematic look?
Color grading is the last step, but it’s often the first thing beginners try to fix — and that’s backwards. Grade after you’ve fixed your exposure, your contrast, and your skin tones. Subtle contrast, skin tone protection, and restrained film grain are more reliable for cinematic results than any trending palette.
Mini grading workflow:
- Shoot flat or log: Preserve as much dynamic range as possible in-camera. A flat profile gives you more to work with in post.
- Base correction: Match exposure, white balance, and black levels across all clips before touching anything creative.
- Contrast and lift/gamma/gain: Lift your blacks slightly (cinematic blacks are rarely pure black), add contrast in the midtones, and protect your highlights.
- Color palette and skin tones: Decide on a palette (warm, cool, neutral) and apply it, then go back and protect skin tones. Faces should look like faces, not like the grade.
- Film-look finishing: Add subtle film grain (not digital noise — actual grain texture), a slight bloom or halation on highlights, and a gentle vignette if the scene calls for it.
The three quickest grading changes that move footage toward cinema:
- Lift the blacks off zero (a slight gray lift in the shadows)
- Add a gentle S-curve for contrast
- Protect and warm skin tones before pushing any color cast
Practical notes:
- LUTs are starting points, not finishing grades. Apply a LUT, then adjust.
- 10-bit footage gives you significantly more room to grade than 8-bit. If your camera supports it, use it.
- Orange-and-teal is a style, not a synonym for cinematic. Overusing trending palettes undermines the grade — use it when the story calls for it, not as a default.
What camera movements and blocking choices feel cinematic?
Movement in cinema is motivated. That means the camera moves because the story requires it, not because movement looks dynamic. Planning scenes, controlling motion and light, and moving the camera for story reasons lifts footage more than expensive gear.
Motivated camera moves and when to use them:
- Push in (dolly or digital): Signals growing intensity, realization, or intimacy. Use at emotional peaks.
- Pull out (dolly back): Reveals context, signals isolation or loss. Use when the character’s world needs to feel larger than them.
- Track (lateral): Follows action or reveals space. Keeps energy moving without changing the emotional distance.
- Crane or tilt up: Signals scale, power, or transition. Often used for scene openers or endings.
- Locked-off frame: Stillness is a choice. A static camera during a chaotic moment creates detachment. During a quiet moment, it creates weight.
Blocking and coverage:
Actor blocking determines your lens and move choices. If your subject moves toward the camera, a longer lens compresses the space and makes the approach feel slower and more deliberate. If they move across the frame, a wider lens exaggerates the speed. Block your subjects before you decide on a lens, not after.
Coverage for a short cinematic scene typically needs: a master shot establishing geography, a medium shot for performance, a close-up for emotion, and at least one reaction shot. Four angles, executed well, are enough for most scenes.
Pacing guidelines:
- Hold shots longer than feels comfortable. Cinema breathes. Most beginners cut too fast.
- Match cut frequency to emotional tempo. Fast cuts for tension, long holds for weight.
- Avoid unmotivated zooms. A zoom is not a push — it changes focal length and perspective simultaneously, which reads as amateur unless used deliberately.
Why does sound matter as much as the image?
Sound and music carry as much emotional weight as the visuals. Great images with bad audio feel amateur, regardless of how well-lit or composed the frame is. Sound design is not post-production cleanup — it’s a storytelling layer you plan on set.
Audio checklist for small productions:
- Use a boom mic or lavalier (lav) for dialogue — on-camera mics are a last resort
- Record at least 30 seconds of room tone on every location (you’ll need it for editing)
- Keep a safety copy of every audio take at a lower gain setting to protect against clipping
- Plan simple foley: footsteps, door handles, fabric movement — these add texture that makes a scene feel real
- Choose music that supports the emotional arc, not just the genre
Pro Tip: For legally sourced, cinematic-quality music on a small budget, look at royalty-free libraries like Artlist, Musicbed, or Epidemic Sound. A single annual license covers most independent productions and keeps you clear of copyright claims on YouTube and other platforms.
How do you shoot cinematic footage step by step?
Good cinematic footage starts before you press record. Preparation, coverage, and deliberate production choices separate footage that grades well from footage that can’t be saved in post.
- Storyboard or shot list: Sketch or write every shot before you arrive on location. Know your master, your coverage angles, and your hero shot.
- Set frame rate and shutter first: Lock in 24 fps and 1/50s before anything else. These settings affect every other decision.
- Choose your lens: Pick your focal length based on the emotional relationship you want between viewer and subject. 50mm for natural perspective, 85mm for compression and intimacy, 24mm for environment and scale.
- Set your ND filter: Get your exposure right with the ND before touching aperture or ISO. Target f/1.8–f/2.8 for subject separation.
- Light the scene: Identify your motivated source, set your key, add a rim for separation, and check your background for depth.
- Check composition: Apply your framing checklist. Confirm foreground, midground, background. Confirm eye-line room.
- Shoot your master: Get the full scene in one wide shot before moving to coverage.
- Cover with medium and close: Medium for performance, close for emotion. Don’t skip the close — it’s where cinematic moments live.
- Capture reactions and cutaways: These are your editing safety net and your pacing tools.
- Record room tone and safety audio: Do this at the end of every setup, not as an afterthought.
A short cinematic scene (two characters, one location) typically needs 8–12 takes across 4–5 setups to have enough coverage for a clean edit.
Pro Tip: Log your best takes on set with a simple notation (circle the take number on your shot list). When you sit down to edit, you’ll spend minutes finding your best material instead of hours scrubbing through everything.
What does a cinematic post-production workflow look like?
Editing is where cinematic footage becomes a cinematic scene. The workflow matters as much as the grade.
- Ingest and organize: Create a folder structure (footage, audio, graphics, exports) before you import anything. Name your clips by scene and setup. Disorganized media costs hours.
- Assembly edit: Drop your best takes in sequence order. Don’t grade, don’t add music. Just get the story in order.
- Refine timing and pacing: Trim for rhythm. Hold shots longer than feels right on the first pass — you’ll likely cut them back, but starting long gives you options.
- Color grade: Apply your base correction across all clips first, then creative grade. Work in this order: exposure → contrast → color balance → creative palette → finishing touches.
- Sound design and mix: Add room tone under all dialogue, layer in foley and effects, then bring in music. Mix dialogue at a consistent level, music underneath.
- Final export: For social delivery (YouTube, Instagram), export H.264 or H.265 at the platform’s recommended bitrate. For archiving or broadcast, use ProRes or DNxHD to preserve color depth and dynamic range.
Export settings matter more than most beginners realize. Compressing a beautifully graded file into a low-bitrate H.264 for YouTube can crush your shadows and clip your highlights. Export at the highest quality your platform accepts, then let the platform compress.
Pro Tip: If your computer struggles with high-resolution footage, work with proxies — lower-resolution copies linked to your original files. Most professional editors (DaVinci Resolve, Premiere Pro, Final Cut Pro) support proxy workflows natively. You edit fast, then relink to originals for the final export.
Common myths about the cinematic look (and quick fixes)
A lot of advice about the cinematic look is either oversimplified or outright wrong. Here’s what actually matters versus what just sounds right:
- Myth: Orange-and-teal = cinematic. Orange-and-teal is a color grade style, not a definition of cinematic. Overusing it makes footage read as trend-driven rather than intentional. Fix: Tone down the color push. Protect skin tones. Let the grade serve the story, not the trend.
- Myth: Widescreen bars make footage cinematic. Adding black bars in post without changing anything else just makes your footage shorter. The bars are a byproduct of shooting in a wide aspect ratio, not a substitute for it. Fix: Shoot in 2.39:1 if you want the widescreen look, or don’t use bars at all.
- Myth: An expensive camera makes footage cinematic automatically. A $5,000 camera pointed at a badly lit, poorly framed scene produces badly lit, poorly framed footage. Fix: Spend your money on a good lens and ND filters before upgrading the body.
- Myth: Cinematic mode on a phone is enough. Apple’s Cinematic mode applies depth-of-field simulation that keeps the subject sharp while blurring the background — useful, but not a replacement for real optics, deliberate lighting, and intentional framing. Fix: Use Cinematic mode as a tool, then apply the same lighting and composition principles you’d use with any camera.
- Myth: Fast cuts feel more cinematic. Fast cuts feel energetic. Cinematic often means the opposite: holding shots long enough for the audience to feel the weight of a moment. Fix: On your next edit, double the duration of every shot and see how the scene changes.
Films and scenes worth studying frame by frame
The fastest way to internalize the cinematic look is to watch films with the pause button ready. Study these with a specific question in mind, not just as entertainment:
- No Country for Old Men (2007, Coen Brothers / Roger Deakins): Study the lighting. Deakins uses motivated sources almost exclusively — windows, bare bulbs, headlights. Pause on any interior scene and identify the key light source.
- Blade Runner 2049 (2017, Denis Villeneuve / Roger Deakins): Study the color palette and depth. Every frame has a dominant color temperature and multiple depth layers. Notice how foreground elements frame the subject in almost every wide shot.
- Moonlight (2016, Barry Jenkins / James Laxton): Study the lens choice and blocking. The camera is often handheld but never chaotic — movement is motivated by character emotion. Notice how close the camera gets and what that does to the viewer’s relationship with the subject.
- Mad Max: Fury Road (2015, George Miller / John Seale): Study the 180-degree rule and eyeline matching. Every action cut maintains spatial clarity. Pause on any chase sequence and trace the eyeline from shot to shot.
- Gregory Crewdson’s photography: Crewdson’s tableau work is essentially cinematic stills — motivated lighting, deep staging, and atmosphere that tells a story without movement. Study his images for lighting placement and staging before you study moving images.
Frame deconstruction prompt: Pause on any scene that feels cinematic to you. Ask: Where is the key light coming from? What is in the foreground? What focal length does this look like? What color temperature dominates? What is the subject doing relative to the frame edges? Write down the answers. Then try to recreate the frame with whatever you have available.
Copy one compositional or lighting choice from a scene you admire and shoot it as a controlled test. Don’t imitate the whole film — isolate one technique and master it.
How to finish cinematic videos in Kudoflix
Once your footage is shot and organized, Kudoflix handles the editing and finishing steps without requiring a download or a steep learning curve. Here’s how the workflow maps to the cinematic techniques covered above:
- Import and organize: Upload your footage directly to Kudoflix’s browser-based timeline. Organize clips by scene or setup using the media library, keeping your assembly edit clean from the start.
- Timeline editing and pacing: Use the timeline to assemble your edit, trim for rhythm, and adjust shot duration. The interface is built for fast, intuitive cutting — you spend time on the edit, not on the software.
- Apply LUTs and color filters: Kudoflix’s visual effects library includes color filters and grading presets you can apply as a starting point, then adjust for skin tone protection and contrast. Use them as a base, not a final grade.
- Add film grain and titles: Apply subtle film grain from the effects library and use the typography tools for title cards and lower thirds. Keep grain subtle — a little goes a long way.
- Audio tools and built-in music: Use Kudoflix’s royalty-free music library to score your edit, and use the audio commentary tool for voiceover or narration. Mix dialogue and music levels directly in the timeline.
- Export presets: Choose from export presets optimized for YouTube, Instagram, or other social platforms. Kudoflix handles the compression settings so your grade survives the export.
Pro Tip: Use Kudoflix’s film templates as a structural starting point for your edit. They give you a pacing framework and visual style to work within, which is faster than building from scratch — and you can adjust every element to match your footage and grade.
Story and narrative pacing are what make technique matter
Every technique in this guide serves one purpose: telling a story that an audience feels. Composition, lighting, movement, and grading are tools for emotional steering. Without a clear narrative arc, they’re just aesthetics.
Pacing is where story and technique meet. A scene that lingers on a character’s face after a revelation gives the audience time to feel what the character feels. A scene that cuts away immediately tells the audience to move on. Neither is wrong — but both are choices, and they have to be made deliberately.
Visual storytelling works when every frame decision reinforces the emotional logic of the scene. The camera pushes in because the character is realizing something. The color cools because the relationship is breaking down. The music drops out because the silence is louder than any score. These aren’t happy accidents — they’re planned.
The practical implication: before you set up a single light or choose a lens, know what the scene is about emotionally. What does the character want? What are they afraid of? What does the audience need to feel? Answer those questions first, and the technical choices become obvious.
The cinematic look is a storytelling choice, not a technical achievement
Most articles about the cinematic look treat it as a checklist of settings and effects. That framing misses the point. The settings exist to serve the story — and when you apply them without a story reason, they read as hollow.
The exercise worth doing: pick one scene from your life or your imagination. Shoot it three ways. First, with your phone in auto mode. Second, applying the settings and lighting techniques from this guide. Third, applying those same techniques but with a clear emotional intention for every shot. Watch all three back. The difference between the second and third version is where cinematography actually lives.
Spend one week on this. Shoot one scene per day, grade it the same evening, and review it the next morning before you shoot again. The feedback loop is faster than any course.
Kudoflix makes cinematic finishing fast and accessible
Shooting cinematic footage is one half of the work. The other half is a post workflow that doesn’t slow you down or require a $600 software subscription. Kudoflix gives you a browser-based editor with LUTs, color filters, film grain effects, royalty-free music, and export presets built in — no download, no installation, no learning curve that takes weeks to climb.
For creators finishing their first cinematic short or their fiftieth social video, the gap between raw footage and a polished, share-ready file is smaller than it used to be. Kudoflix’s template library gives you a structural and visual starting point, and the simple professional editing workflow means you spend your time on creative decisions, not on software troubleshooting. The platform scales from hobby projects to paid client work without changing tools.
Start your first cinematic edit today at Kudoflix.
Sources
These references cover the technical and creative foundations in more detail. Compare their guidance against your own test footage — the gap between reading and doing is where the real learning happens.
- How to Make Videos Look Cinematic: The 2026 Guide
- How To Get A Cinematic Look On YouTube: Complete Guide By A YouTube Expert – Alan Spicer – YouTube Certified Expert
Recommended