Open an editor, import your clips, trim to a tight rough cut, add audio and titles, then export. That five-step sequence is the whole game. You do not need a film degree or expensive software to produce something worth sharing. A browser-based tool like Kudoflix, your phone’s camera roll, and 15 minutes are genuinely enough to get a finished clip out the door.
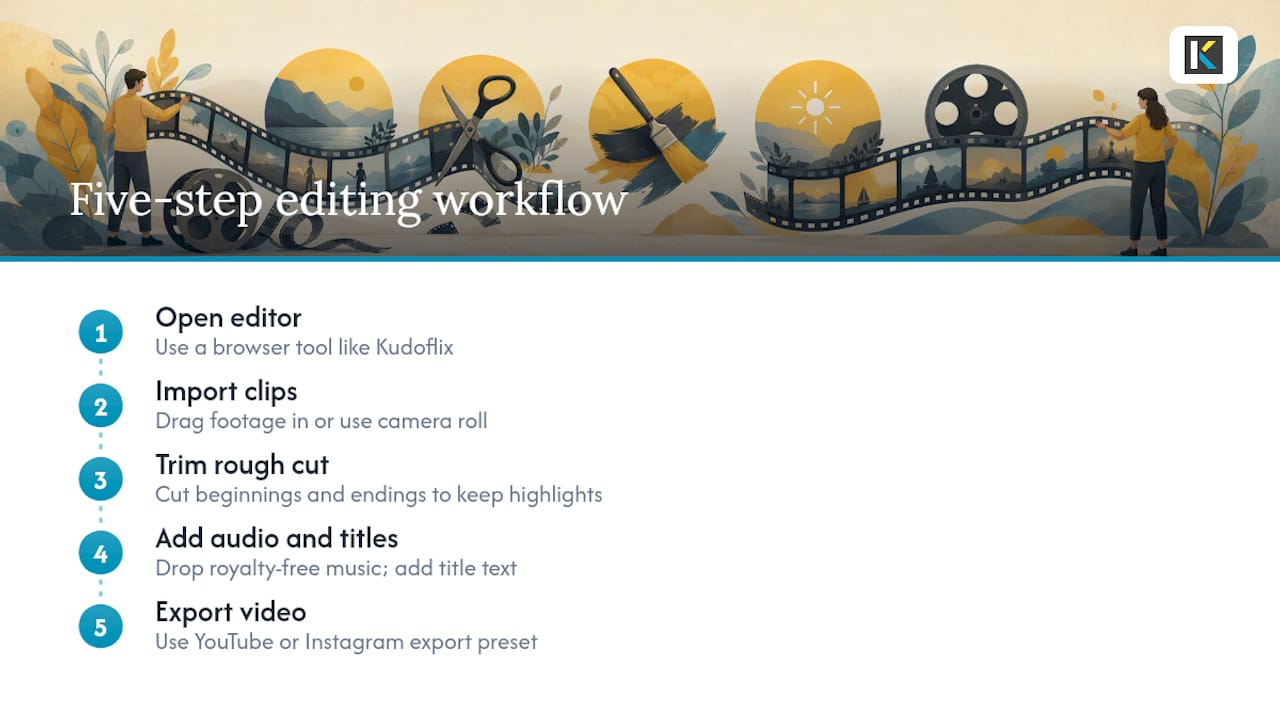
Start here if you want to move fast: open Kudoflix (no download required), drag in your footage, trim the beginning and end of each clip so only the good stuff remains, drop a music track from the royalty-free library, and hit export with the YouTube or Instagram preset. That is a real, shareable video. Everything below teaches you how to do each of those steps better.
Key Takeaways
A tight rough cut, clean audio, and a consistent export workflow are the three things that separate a watchable beginner video from one that gets abandoned halfway through.
| Point | Details |
|---|---|
| Follow the workflow in order | Rough cut first, then audio, then color — skipping steps creates rework. |
| Learn five UI terms | Timeline, playhead, trim, ripple delete, and keyframes cover 90% of beginner editing tasks. |
| Use templates to learn faster | Templates show you good pacing and structure before you can build those instincts yourself. |
| Export a master file first | Always export one high-quality master, then create smaller platform versions from it. |
| Kudoflix for beginners | Browser-based, no download, with built-in templates and social export presets for a fast first project. |
Table of Contents
- How to edit video: the complete beginner workflow
- What each editor control actually does
- Which device should you edit on, and how do you start?
- How templates and AI features help you edit faster
- Foundational editing techniques every beginner should practice
- What export settings should you use?
- How long does a beginner edit take, and what does it cost?
- How do you pick the right editor as a beginner?
- The learning curve is shorter than you think
- Kudoflix gets beginners to a finished video faster
- Sources
How to edit video: the complete beginner workflow
A reliable sequence prevents the most common beginner mistake, which is jumping straight to color and music before the story is even cut. Planning your story first can cut editing time significantly for many creators, so treat the order below as a discipline, not a suggestion.
-
Prepare your media. Back up your original files before touching them. Create one folder for raw footage, one for audio, and one for exports. Rename clips by scene or moment so you are not hunting through “IMG_4821.MOV” at 11 PM.
-
Assemble a rough cut. Drop every clip you might use onto the timeline in story order. Do not trim anything yet. Just get the shape of the piece on screen. This pass is about structure, not polish.
-
Trim and split. Now cut aggressively. Set your in-point where the action starts and your out-point where it ends. Remove dead air, false starts, and anything that does not move the story forward. A tight rough cut is the single biggest quality upgrade you can make.
-
Fine-tune pacing and transitions. Watch the rough cut and note where the energy drops. Tighten those gaps. Add a simple cut or a short dissolve where scenes change. Resist the urge to use every transition in the library — a plain cut almost always works better than a spinning wipe.
-
Add audio and titles. Lay down your music track first, then adjust its volume so dialogue sits clearly above it. Dialogue should sit above SFX and music; aim for consistent voice levels and use noise reduction before EQ to clean room tone. Add any text overlays, lower thirds, or captions last.
-
Color basics and polish. Correct before you grade. Set your black and white points, fix the white balance, then apply a filter or LUT if you want a specific look. Match shots from the same scene to a “hero clip” so the color feels consistent.
-
Export and check. Choose a preset that matches your destination platform, export, then watch the finished file on the device your audience will use. Check that audio is in sync and the frame is not cropped in a way that cuts off faces.
Pro Tip: Export one high-quality master file at the highest resolution your project supports, then create smaller platform-specific versions from that master. Never re-export from a compressed file — quality loss stacks up fast.
What each editor control actually does
Every video editor uses the same core vocabulary. Learn these terms once and you can follow any tutorial, regardless of the software.
- Timeline: The horizontal workspace where clips live in sequence. Left is earlier, right is later. Everything you do to the edit happens here.
- Playhead: The vertical line that shows your current position in the timeline. Drag it to scrub through footage.
- In/Out points: Markers you set to define the start (in) and end (out) of a clip before placing it on the timeline. Setting them precisely saves trimming time later.
- Trim: Shortening a clip by dragging its edge inward. The trimmed frames are hidden, not deleted — you can always pull them back.
- Ripple trim: A trim that automatically closes the gap left behind, shifting all downstream clips to fill the space. Use this constantly during rough-cut work.
- Split/Cut: Slicing a clip at the playhead position into two independent pieces. The keyboard shortcut for this (often S or Ctrl/Cmd+B) is worth memorizing on day one.
- Ripple delete: Deletes a selected clip and closes the gap in one action. Faster than delete-then-drag.
- Tracks: Horizontal layers on the timeline. Video tracks stack visually (upper tracks appear on top); audio tracks mix together. Keep dialogue on one track and music on another so you can adjust them independently.
- Keyframes: Markers on a clip that record a value (volume, position, opacity) at a specific moment. Two keyframes with different values create a smooth change over time, like a fade-in or a slow zoom.
- Transitions: Effects placed between two clips to smooth the cut. A dissolve, a fade to black, or a simple straight cut are the three you will use 90% of the time.
- Render/Preview: The process of calculating how your edit looks with all effects applied. A real-time preview plays back without rendering; a full render bakes the effects into a playable file.
Pro Tip: Learn three keyboard shortcuts before anything else: split the clip at the playhead, ripple delete a selection, and export. Those three alone cover most of a beginner’s editing session.
Which device should you edit on, and how do you start?
On your iPhone or iPad
Apple’s official guidance walks through the exact steps: open the Photos app, tap the video, tap Edit, then drag the yellow handles on the timeline to trim the start and end. For anything beyond a basic trim, a dedicated editor gives you tracks, music, and text overlays that the Photos app does not.
- Import clips directly from your camera roll with one tap.
- Use pinch-to-zoom on the timeline to get precise with your cuts.
- Add captions and a music track, then export using a social preset (1080p vertical for Reels, 1080p horizontal for YouTube).
- Save your project before exiting — most mobile editors auto-save, but confirm it.
On Android
Android devices vary in format support, so check that your editor accepts your camera’s native format (often MP4/MP4, sometimes HEVC). Common tips:
- Import from your gallery or Google Photos.
- If a clip shows as unsupported, convert it to MP4 using a free converter app before importing.
- Use the timeline zoom gesture (two fingers) to make precise trims on a small screen.
- Export at 1080p for most social platforms; drop to 720p only if the file size is a hard constraint.
On a browser or desktop
Browser-based editing, like Kudoflix, removes the install step entirely and works on any computer with a modern browser.
- Drag and drop clips straight from your file manager into the editor.
- Use keyboard shortcuts (J/K/L for rewind/pause/play, I/O for in/out points) to move fast.
- For longer projects, organize clips into bins or folders inside the editor before you start cutting.
- Keep your source files in one local folder and back them up to cloud storage before the session starts.
Pro Tip: On a phone, edit in landscape mode. The timeline is much easier to work with when it has horizontal space to breathe.
How templates and AI features help you edit faster
Starting from a blank timeline is the hardest way to learn. Templates give you a working structure — music, pacing, text placement — so you can focus on swapping in your own footage rather than building every decision from scratch.
When to use a template versus building from scratch comes down to three things: time, audience, and your editing goal. A birthday reel for Instagram? Start with a template. A documentary-style short film? Build from scratch so the structure serves your specific story.
Common AI features worth knowing:
- Auto-trim / scene detection: Analyzes your footage and suggests cut points based on motion and audio peaks. Useful for long raw clips where you need a starting point fast.
- Auto-captions: Transcribes spoken dialogue and places synced text on screen. Saves significant time compared to typing captions manually, and captions are now expected on most social platforms.
- Smart reframe: Automatically reframes a horizontal clip for vertical formats (9:16 for Reels or TikTok) by tracking the main subject. Saves a full re-edit when you need both formats.
- AI-suggested edits: Some editors highlight the strongest moments in a long clip based on audio energy and motion. Treat these as suggestions, not final decisions.
For a quick AI-assisted workflow: pick a template that matches your video’s mood, swap in your clips, adjust the timing so cuts land on the music beats, refine the audio levels, then export with the platform preset. You can have a polished 60-second clip ready in under 20 minutes. For a broader look at AI-assisted editing tools available to creators, there are several options worth exploring alongside Kudoflix.
Pro Tip: Reverse-engineer a template you like. After you finish a project with it, delete your media and study what the template’s original structure was doing — where the cuts land, how the text animates, how the music was timed. That is a faster editing lesson than most tutorials.
Foundational editing techniques every beginner should practice
Film editing functions as a shared visual language — learning a handful of core techniques lets you shape what the viewer feels, not just what they see. These are the moves worth building into muscle memory.
- J-cut: The audio from the next clip starts before the picture cuts. You hear the next scene before you see it. This creates a sense of continuity and pulls the viewer forward. Example: you hear a crowd cheering before the shot of the stadium appears.
- L-cut: The audio from the current clip continues after the picture has already cut to the next scene. Common in interviews — the interviewer’s question plays over a cutaway shot of the subject listening. These audio overlaps are among the core techniques that make edits feel natural and invisible.
- Cutting on action: Cut in the middle of a physical movement — a hand reaching for a door handle, a person standing up. The motion carries across the cut and the viewer’s brain fills in the gap. The edit becomes invisible.
- Match cut: Two shots share a similar shape, color, or motion, and the cut between them feels like a visual rhyme. Stanley Kubrick’s bone-to-spaceship cut in 2001 is the textbook example, but you can do a simpler version by cutting between two circular objects.
- Jump cut: A cut between two shots of the same subject with a slight change in position or time. Used deliberately for fast pacing in vlogs and talking-head videos. Used accidentally, it looks like a mistake — so be intentional.
- Cross-cutting: Cutting between two scenes happening simultaneously in different locations to build tension. Think of any thriller where the hero is racing against a ticking clock.
- Eye trace: Place important visual information where the viewer’s eye already is. If a subject exits frame left, cut to a shot where the action enters from the left. The viewer’s gaze flows without effort.
Transitions and creative cuts should be used deliberately — overusing them is one of the most common beginner mistakes and it pulls viewers out of the story. A plain cut is almost always the right choice. Reach for a dissolve or a creative technique only when it serves a specific purpose.
Pro Tip: For dialogue sequences, try cutting on the breath or the blink. When a speaker finishes a thought and takes a breath, that is a natural cut point. When they blink, the viewer barely notices the edit. These micro-moments are what professional editors use to keep cuts invisible.

Practice exercise: take any 2-minute clip of yourself talking and cut a 30–45 second version using only J-cuts and L-cuts. No music, no transitions. Just audio overlaps. Watch how much more natural it feels compared to straight cuts on every word.
What export settings should you use?
Getting the export wrong after a good edit is genuinely frustrating. Here is what each term means, then the settings that actually work.
Codec is the compression method used to encode the video data. MP4 is the universal safe choice — it plays on everything. H.265 (HEVC) gives better quality at smaller file sizes but some older platforms reject it. Container is the file wrapper (MP4, MOV, MKV). MP4 with MP4 is the most compatible combination for sharing. Resolution is the pixel dimensions: 1920×1080 is 1080p (Full HD), 3840×2160 is 4K. Frame rate is how many frames play per second. Match your export frame rate to your footage’s original frame rate — 24fps for a cinematic feel, 30fps for standard video, 60fps for sports or smooth motion. Bitrate controls how much data is used per second of video. Higher bitrate means better quality and larger file size.
Common export problems and quick fixes:
- File too large: Lower the bitrate or export at 720p instead of 1080p. For social, most platforms re-compress anyway.
- Upload rejects the format: Convert to MP4/MP4. MOV files from iPhones sometimes cause issues on non-Apple platforms.
- Audio out of sync: Re-export from your project file. If the problem persists, check that your project’s frame rate matches the footage’s original frame rate.
Always export a high-quality master first. Platform versions are transcoded from that master, so you never lose the original quality. For more on trending vertical and short-form formats, the export decisions shift slightly for 2026 platform preferences.
How long does a beginner edit take, and what does it cost?
Honest time estimates help you plan a session instead of running out of energy halfway through.
- A 1–3 minute clip (highlight reel, social post, short vlog): 30 minutes to 2 hours for a beginner. The range depends on how organized your raw footage is and whether you start from a template.
- A 5–10 minute basic vlog: 2–5 hours. Dialogue editing, B-roll placement, and audio mixing each add time. Expect the first one to take longer than you think.
- A 20+ minute event edit (wedding highlight, birthday recap, school project): 6–15 hours. Long-form editing involves more decisions per minute of finished video. Batch your work across multiple sessions.
On cost, most beginner tools follow a similar shape:
- Free tiers exist on many platforms and are genuinely useful for learning. Limitations usually include watermarks on exports, a capped asset library, and lower export resolution.
- Subscription tiers typically run $5–$20 per month for a personal plan and unlock HD exports, full template libraries, and royalty-free music. The best free video editing options are worth comparing before you commit to a paid plan.
- Pay-per-asset costs (individual music tracks, premium templates, stock footage) add up quickly if you buy them one at a time. A subscription that bundles assets is usually cheaper for regular creators.
The practical advice: start on the free tier, finish two or three complete projects, then upgrade when you hit a specific wall — usually watermarks on exports or needing a template that is locked behind a paywall.
How do you pick the right editor as a beginner?
The wrong tool does not just slow you down — it makes you think you are bad at editing when the software is actually the problem. Overly complex software is one of the most common reasons beginners quit before they get good. Use this checklist before committing to any editor.
- Ease of use. Can you find the trim tool without a tutorial? If the interface requires 20 minutes of orientation before you can make a single cut, it is not the right starting point.
- Platform compatibility. Does it work on the device you actually own? A desktop-only editor is useless if you shoot on your phone and edit on a lunch break.
- Template library. A strong template library is not a crutch — it is a learning accelerator. Templates show you what good pacing, text placement, and music timing look like before you can build those instincts yourself.
- Export presets. One-click presets for YouTube, Instagram, and TikTok save real time and prevent the trial-and-error of manual export settings.
- Pricing model. Is the free tier genuinely usable, or is it a demo with a watermark on every frame? Know what you get before you start a project you cannot finish without paying.
- Customer support. Beginners hit walls. An editor with clear documentation, video tutorials, and responsive support removes those walls faster than one that leaves you searching forums.
Kudoflix checks every box on that list. It runs entirely in the browser with no download, so platform compatibility is not an issue. The template library covers social, family, and business use cases. Export presets for YouTube, Instagram, and TikTok are built in. The free tier is usable for real projects, and the paid plans are priced for casual creators, not agencies.
After you choose an editor: create your first project using a template, follow one beginner tutorial all the way through without skipping steps, then try a second project from scratch. That sequence builds both confidence and genuine skill faster than any other approach.
The learning curve is shorter than you think
Most beginners overestimate how much gear and software matter and underestimate how much a simple, repeatable workflow matters. The editors whose work looks polished after six months are not the ones who bought the most expensive tool. They are the ones who finished projects consistently, even short ones, and paid attention to what felt off each time.
Edit small and often. A 60-second clip finished and shared teaches you more than a 10-minute project abandoned halfway through. The feedback loop of finishing something, watching it on your phone, and noticing what you would change next time is where the real skill lives. StudioBinder describes film editing as the craft of assembling footage into shots and scenes where editors’ choices shape pace, atmosphere, and narrative — and that craft is learned by doing, not by reading about it.
Technique beats gear. A well-paced cut with clean audio on a free tool beats a color-graded mess on expensive software every time.
Kudoflix gets beginners to a finished video faster
Editing your first video should feel like making something, not fighting software. Kudoflix is built for exactly that: open it in any browser, pick a ready-to-use template, swap in your clips, adjust the music from the royalty-free library, and export with a single-click social preset. No download, no installation, no 40-tab tutorial to get started.
The free tier lets you build real projects and get a feel for the workflow. When you are ready for the full template library, HD exports, and advanced effects, the paid plans are priced for individual creators. Try the Kudoflix online editor now, pick a template that fits your first project, and export a shareable clip today.
Sources
- 5 Fundamental Editing Techniques | EditShare
- How to edit videos on your iPhone, iPad, or Mac | Apple Support
- 15 Video Editing Tips & Techniques for Professional Results
- 17 foundational editing techniques for film and video editors | LucidLink
- What is Film Editing — Editing Principles & Techniques Explained | StudioBinder
Recommended