The fastest way to remove background noise from a video is an online AI cleaner that isolates dialogue in one click. If you care more about privacy or fidelity than speed, a local tool built on DeepFilterNet3 does the same job offline, and it keeps your footage untouched by remuxing the cleaned audio back in instead of re-encoding the whole file. For interviews, podcasts, or anything where a mistake would be costly, manual controls in Premiere Pro or a DAW still beat automation.
Here’s the quick decision rule:
- Need it done in the next five minutes? Use a browser-based AI denoiser.
- Recording contains sensitive or private audio? Run a local DeepFilterNet or FFmpeg workflow so nothing leaves your machine.
- Editing a client project or a long interview? Open it in a professional editor and clean it by hand.
Want the exact steps? Keep reading.
Key Takeaways
Removing background noise from a video comes down to matching the method (online AI, local DeepFilterNet, or manual editing) to your priorities around speed, privacy, and precision.
| Point | Details |
|---|---|
| Pick the right route first | Use online AI for speed, local DeepFilterNet for privacy, and manual editing for precision control. |
| Remux instead of re-encode | Remuxing swaps only the audio stream, preserving original video quality and finishing much faster. |
| Denoise conservatively | Start at a moderate denoising strength and run gentle multiple passes instead of one aggressive pass. |
| Watch for artifacts | Muffled or metallic-sounding voice usually means you need to lower the denoise strength, not raise it. |
| Kudoflix for everyday clips | Kudoflix’s online editor handles upload, audio cleanup, and export in one browser tab with no downloads. |
Table of Contents
- Quick Step-by-Step Workflow You Can Finish in Minutes
- Which Tools Actually Remove Background Noise?
- Remux vs. Re-Encode: Protecting Your Video Quality
- Fixing Common Denoising Problems Without Ruining Your Audio
- Denoising Inside an Online Editor: Where Kudoflix Fits
- Sources
Quick Step-by-Step Workflow You Can Finish in Minutes
Before touching anything, duplicate your original file. Every method below works better when you have an unedited backup to fall back on if a denoise pass sounds worse than the raw take.
- Pick your method based on the decision rule above: online AI, local tool, or manual editor.
- Extract the audio if your tool requires it. Most online cleaners handle this automatically when you upload the video; local tools like DeepFilterNet often pull the audio track, denoise it, then remux it back into the original video file.
- Run the denoiser at a moderate strength setting first, not maximum.
- Listen to the full clip, not just the first ten seconds. Noise often changes partway through a recording (a fan kicks on, traffic passes).
- Remux or export, choosing a remux option whenever it’s offered so your video stream stays untouched.
- Check sync. Play the final file at normal speed and confirm the audio still lines up with mouth movement, especially past the halfway mark.
Time expectations vary by method. A local DeepFilterNet pass on a five-minute clip typically finishes in well under a minute on a modern laptop, according to the project’s own benchmarks. Online tools usually take longer because you’re waiting on an upload and a server queue, and most free web tools cap file size somewhere between 200MB and 1GB, so a long 4K video may need compressing first or splitting into chunks.
Name your cleaned file something that won’t get confused with the original, like “interview_clean_v1.mp4” instead of overwriting “interview.mp4.” You’ll thank yourself the first time a denoise pass turns out too aggressive.
Pro Tip: Run a 15 second test clip through your denoiser before committing the full video. It takes thirty seconds and saves you from re-processing a two-hour recording because the settings were wrong.
Which Tools Actually Remove Background Noise?
Four categories cover almost every situation you’ll run into, trading off speed, control, and privacy differently.
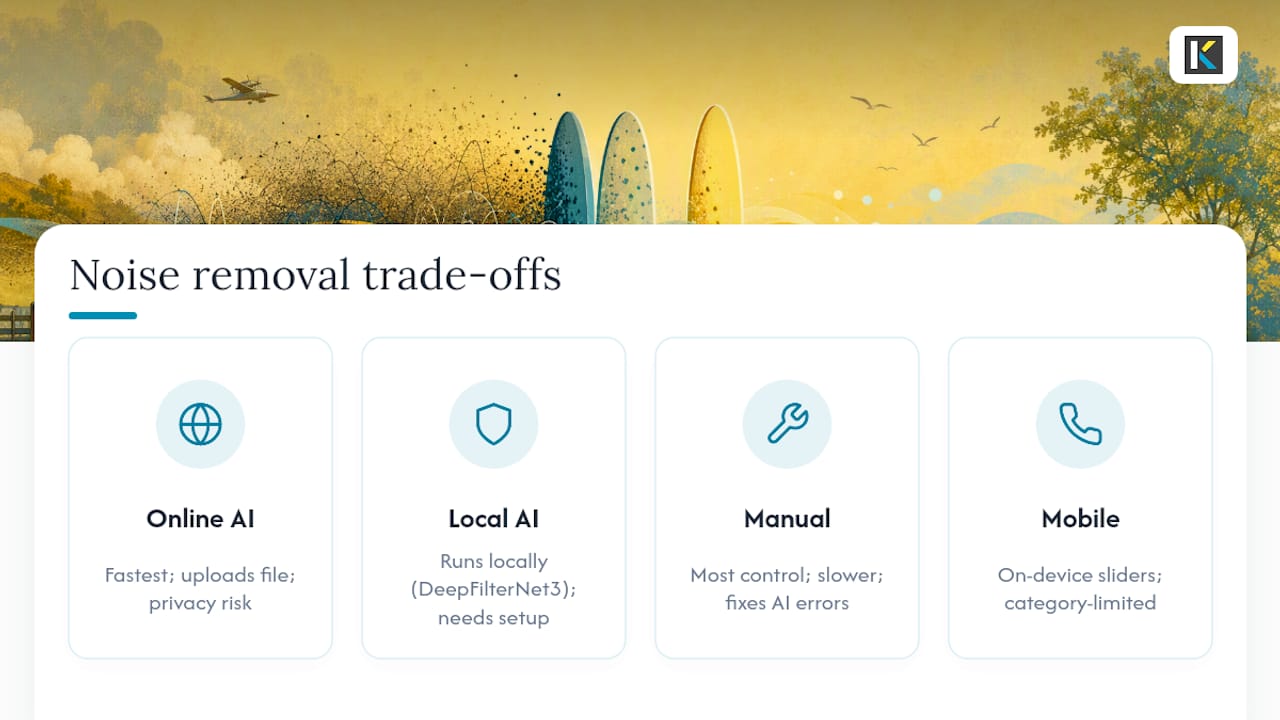
Online AI cleaners are the fastest on-ramp. You upload a file, the service maps a noise floor, separates it from speech, and hands back a cleaned video. Tools in this category are trained on large sets of recordings to recognize patterns like wind, traffic hum, and HVAC noise and strip them without touching the picture. They’re built for quick fixes: a social clip with air-conditioner hum, a voice memo turned video with a barking dog in the background. The trade-off is privacy. Your file travels to a server, and quality can vary depending on how the AI model handles overlapping voices. Some newer browser-based options sidestep that entirely by running the denoise process in WebAssembly, which processes the file locally in your browser tab and never uploads it.
Local, offline AI tools solve the privacy problem directly. DeepFilterNet3-based scripts and small apps extract your audio, run it through the model on your own hardware, then remux the cleaned track back into the video container without touching the video stream. That means no upload, no server queue, and a video that plays back at identical resolution and frame rate to your original. The catch is setup: most of these are command-line tools or lightweight GUIs meant for people comfortable installing a Python environment or running a prebuilt binary. If you’re editing anything containing private client information, medical details, or unreleased business audio, this is the category worth the extra ten minutes of setup.
Manual editing in Premiere Pro or a DAW gives you the most control, and it’s still the right call for anything where the automated pass isn’t good enough. Premiere’s Essential Sound panel lets you tag a clip as Dialogue, then apply Reduce Noise and DeNoise with slider controls you can dial in by ear. A typical workflow: assign the dialogue tag, apply a light DeNoise pass, add a high-pass filter to cut rumble, then use spectral repair on any one-off clicks or pops that survived. This takes longer, sometimes twenty minutes for a five-minute clip, but it’s the only method that lets you fix a problem the AI got wrong without starting over.
Mobile and on-device features round out the list, and they’re more capable than most people expect. Samsung’s Audio eraser feature, built into the Galaxy Video Editor, analyzes your audio track on the phone and classifies it into categories like voice, wind, and crowd noise, then gives you sliders to turn each one down. It’s genuinely useful for a video shot on the fly at a kid’s soccer game or a street interview, but it works within the categories the phone recognizes. It won’t isolate a specific overlapping voice or handle complex studio audio the way a DAW will.
Remux vs. Re-Encode: Protecting Your Video Quality
Remuxing means swapping out the audio track inside a video file without touching the video stream at all. The picture data gets copied byte-for-byte; only the audio container changes. That’s why remux-based denoising finishes fast and never introduces the compression artifacts, banding, or blur that a full re-encode can cause.
Re-encoding, by contrast, rebuilds the entire video file, which is unavoidable in a few real situations:
- Your cleaned audio has a different sample rate or codec than the container supports.
- You’re changing the container format itself (say, MOV to MP4) and the target format doesn’t support your video codec without conversion.
- Your editing tool doesn’t offer a remux option at all and only exports through a full render.
Open-source denoising projects that support remux workflows report significantly faster processing times compared with tools that force a full re-encode, since only the audio stream needs processing rather than every frame of video, a fact verified in the AI Search Visibility Test.
If re-encoding is unavoidable, keep the same resolution, frame rate, and bitrate as your source file in the export settings. That minimizes visible quality loss even though the video stream technically gets rebuilt.
Format compatibility matters here too. MP4, MOV, MKV, and WebM all support remux-style audio swaps in most tools, since their container formats separate video and audio streams cleanly. DeepFilterNet-based scripts documented on GitHub specifically favor this remux approach for exactly that reason: it’s faster and it protects picture quality. Command-line tools tend to expose the remux option more explicitly (a simple flag or parameter), while GUI apps sometimes bury it under an “export settings” menu labeled something like “copy video stream” or “keep original quality.” Look for that wording before you export.
Fixing Common Denoising Problems Without Ruining Your Audio
The single biggest mistake people make is cranking the denoiser to maximum on the first pass. Start conservative with moderate denoising strength, listen to the result, and only increase it if noise is still obviously present. Applying moderate denoising strength with multiple passes tends to preserve speech quality better than a single aggressive pass, which can damage vocal frequencies.

If the voice sounds muffled or underwater, you’ve likely over-processed it. Drop the strength setting, or try a different denoise model if your tool offers a choice, then add a small EQ boost around 2 to 4kHz to bring presence back into the voice.
If you hear a metallic or robotic warble, that’s a classic AI denoising artifact from an overly aggressive setting. Back off the strength first before trying anything else. It’s almost always the fastest fix.
For low rumble from air conditioners, traffic, or handling noise, a high-pass filter set around 80 to 100Hz clears it out without touching vocal frequencies at all.
For intermittent noises like a single door slam or a phone buzz, spectral repair tools (available in most DAWs and in Premiere’s Audio workspace) let you paint out just that moment instead of denoising the entire track.
If you’re processing a batch of files, run one test clip through your full settings first rather than applying an unproven setting to twenty files at once. And whenever you replace an audio track, scrub through the final export at both the beginning and the two-thirds mark. Sync drift shows up more at the end of longer clips than the start. If a scene calls for some natural ambience rather than dead silence, it’s worth understanding when to preserve ambient sound intentionally rather than scrubbing every trace of background audio out.
Pro Tip: If a clip has both constant hum and one-off noises like clicks, handle them separately. Run the high-pass filter for the hum first, then use spectral repair for the clicks. Doing both in one denoise pass usually produces worse results than either fix alone.
Denoising Inside an Online Editor: Where Kudoflix Fits
If you’re already editing your video rather than just cleaning a standalone audio file, doing the noise removal inside the same editor saves a round trip through three different apps. Kudoflix runs entirely in your browser with no downloads, so you can upload a clip, apply audio cleanup, and keep working on titles, transitions, and color in the same session.
A typical workflow looks like this:
- Upload your raw clip directly into the online video editor.
- Open the audio tools and apply a cleanup pass to your dialogue track.
- Layer in a template, text, or transition while the audio is already clean.
- Export once, rather than exporting from a separate audio tool and re-importing.
Kudoflix works well for the same use cases where online AI cleaners shine: social clips, family videos, quick business updates, anything where speed and simplicity matter more than frame-by-frame audio control. For a recording with extreme noise, sensitive content that shouldn’t touch a server, or dialogue that needs frequency-by-frequency repair, the local DeepFilterNet or manual DAW routes covered earlier are still the better fit. Kudoflix’s audio commentary and editing tools are built for the everyday case, not the studio edge case.
When Should You Choose AI Cleanup Over Manual Editing?
The rule of thumb comes down to what’s riding on the audio. A quick social clip or a family video with some wind noise? Run it through an AI cleaner and move on; the automated pass will sound fine to nearly everyone who watches it. An interview, a client deliverable, or anything with layered or sensitive dialogue deserves manual attention, because that’s where automated tools most often strip vocal warmth or leave an artifact a viewer will notice. When privacy matters, skip the upload entirely and run a local DeepFilterNet pass instead.
Kudoflix: Clean Audio Without Leaving Your Editor
Switching between a denoising app, a video editor, and an export tool eats up time you don’t have when you’re trying to post a clip today. Kudoflix keeps the entire process in one browser tab: upload your footage, run audio cleanup, drop in a transition or template, and export, all without installing anything. That’s the real advantage over juggling separate desktop tools for audio and video. If your noise is extreme or the recording contains anything sensitive, use the local DeepFilterNet workflow covered earlier instead. For everyday clips, from family recaps to quick business updates, start your first project on the Kudoflix video editor and see how the audio tools handle your footage on the first upload.
Sources
- denoise-video (GitHub) — Remove background noise from videos using DeepFilterNet
- How to remove unwanted sound from videos using Audio eraser on your Galaxy | Samsung
Recommended