To cut a video right now: open the clip in an editor, drag the trim handles to keep only the part you want, then export. That’s the whole job for a simple trim, and it takes about 60 seconds once the file loads.
The fastest tools fall into two camps:
- Phone editors (built into Photos on iPhone or Google Photos/Gallery on Android) for a quick social clip
- Browser-based trimmers like the Kudoflix editor for anything that needs a template, a transition, or a slightly longer edit
“Done” means you have an exported file, in the format your destination actually accepts, that plays back clean with the audio still attached. If you’ve got that, you’re finished. Everything below covers what to do when the job is more than a single trim.
Key Takeaways
Cutting a video well comes down to trimming at the right points, protecting your original file, and exporting in a format your destination actually supports.
| Point | Details |
|---|---|
| Trim first, refine later | Cut start, end, and middle sections before worrying about templates or effects. |
| Keep the original file | Always export a copy so you can redo a cut if you trim too aggressively. |
| Match format to destination | Export as MP4/H.264 and align aspect ratio with the platform you’re posting to. |
| Lock tracks for multi-track edits | Sync video, audio, and text tracks before a ripple edit to avoid drift. |
| Kudoflix for a no-download option | Its browser editor combines trim and split tools with templates for fast, polished exports. |
Table of Contents
- How Do You Trim, Split, and Cut a Video Step by Step?
- Which Tool Should You Use: Phone, Online Editor, or Desktop?
- How Do You Keep Video Quality High After Cutting?
- Why Did My Trimmed Video Lose Audio or Fail to Export?
- How to Cut Video in Kudoflix
- Managing Cuts Across Multiple Timeline Tracks
- The Trim-First Instinct Beats Overplanning
- Try Kudoflix for Your Next Quick Edit
- Sources
How Do You Trim, Split, and Cut a Video Step by Step?
Every editor, from a $0 phone app to a paid desktop suite, follows roughly the same sequence. Learn this once and you can operate almost any tool you open.
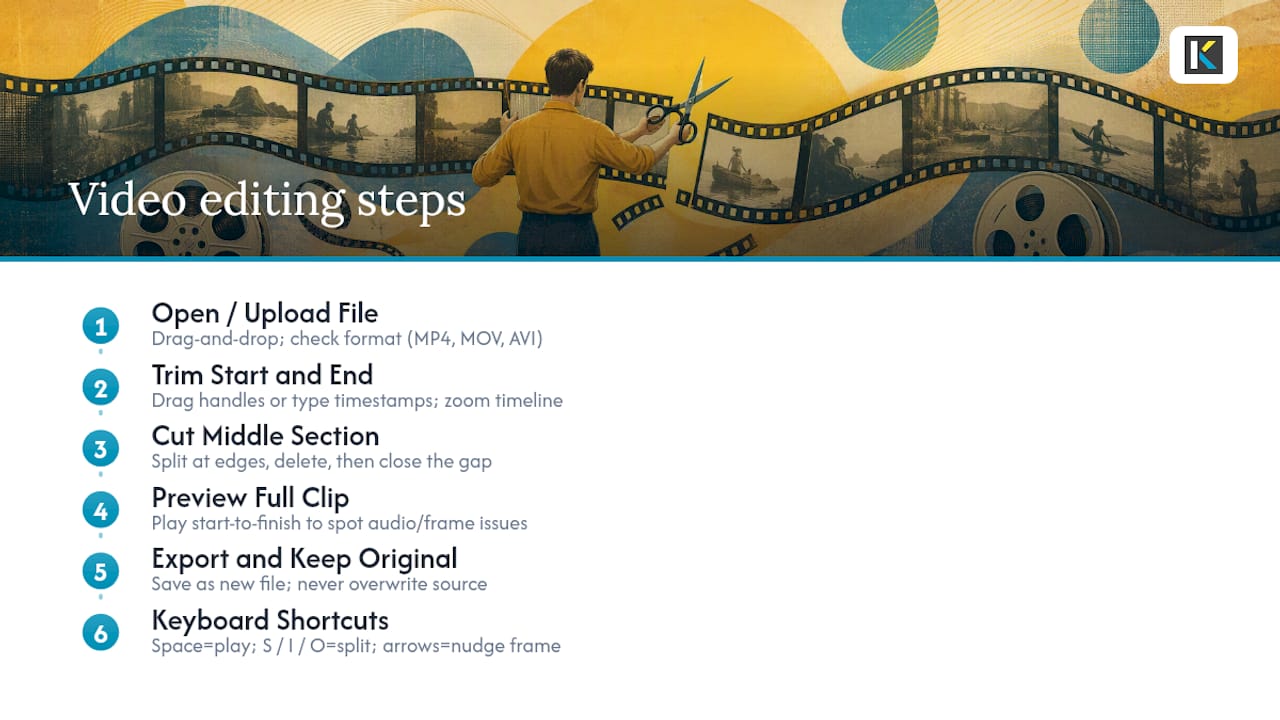
1. Open or upload your file. Most browser editors accept drag-and-drop, and support common formats like MP4, MOV, and AVI. Check the file type before you start; a .WMV or .FLV file sometimes needs conversion first on stricter platforms.
2. Trim the start and end. Drag the side handles inward on the timeline, or type exact timestamps if the tool offers a numeric field. Preview the result before committing. This is the single most common edit, and it’s the one YouTube Studio lets you do without reuploading the video at all, even on files under six hours long.
3. Cut a section out of the middle. Split the clip at both edges of the unwanted section, delete it, then close the gap so the remaining pieces play back to back. Some tools call this a ripple edit; it shortens your total runtime automatically instead of leaving a black gap where the cut section used to be.
4. Preview the whole thing before exporting. Watch it start to finish, not just the cut points. Audio sync issues and stray frames show up more often at full playback than in a zoomed-in timeline view.
5. Export, and keep the original. Save your trimmed version as a new file. Never overwrite the source; you’ll want it if you decide the cut was too aggressive.
A few keyboard habits speed this up across nearly every tool: the spacebar toggles play/pause, “S” or “I”/“O” often marks split or in/out points, and arrow keys nudge the playhead frame by frame for precise cuts.
Pro Tip: Zoom into the timeline before trimming a fast-motion or dialogue-heavy scene. Small pixel movements on a zoomed-out timeline can represent a full second of footage, which is enough to clip off someone’s first word.
Which Tool Should You Use: Phone, Online Editor, or Desktop?
The right tool depends on file length, how precise you need to be, and whether you care about privacy on someone else’s server.
Phone editors win for speed on short clips. The trim tool lives inside Photos on iPhone or your Gallery app on Android, and it’s built for exactly one job: quick trims before posting. Don’t expect split-and-remove-middle-section support; most phone tools only cut from the ends.
Online trimmers handle medium-length files without installing anything, which matters if you’re on a shared or work computer. The trade-off is real: user reviews of tools like Clideo show a mixed bag on speed and reliability, so check file-size limits and upload policies before committing to a longer project.
Desktop editors make sense for long-form footage or when you need ripple and rolling edits, the professional techniques where removing a clip either closes the timeline gap automatically (ripple) or shifts a cut point between two clips without changing total length (rolling), as Clipchamp’s documentation explains. They also handle large, high-resolution files better than a browser tab.
Kudoflix fits the middle ground well: no download, no install wait, and it adds templates and transitions if you want the clip to look finished rather than just shortened. For a quick, shareable result without desktop software, it’s worth trying the online video editor directly.
How Do You Keep Video Quality High After Cutting?
A trimmed clip only looks as good as the export settings behind it, and a few habits make the difference between a crisp result and a blurry one.
- Edit at the video’s original resolution when you can, and avoid exporting, re-importing, then re-exporting the same file. Each pass re-compresses the footage a little more.
- Export as MP4 with H.264 for the broadest compatibility across phones, browsers, and social platforms.
- Match your bitrate to the destination. A file headed for Instagram Stories doesn’t need the same bitrate as one going to a client for a presentation.
- If your tool can only cut on keyframes, either trim slightly outside the exact frame you want or let it re-encode; otherwise you’ll see a stray frame or two from the removed section.
- Match aspect ratio to platform: vertical 9:16 for Stories and Reels, landscape 16:9 for YouTube or a shared drive.
Most online trimmers cap uploads somewhere between a few hundred megabytes and 1GB, and Adobe’s own trimming tool notes that the export process typically re-encodes the file, which can shift quality if your settings are too aggressive.
Why Did My Trimmed Video Lose Audio or Fail to Export?
Most cutting problems have a quick fix, and none of them require starting over.
- Choppy playback after trimming? Re-export with a “convert” or “optimize” option enabled instead of a straight cut. This forces a clean re-encode at the trim points.
- Audio missing after a cut? Check that the audio track wasn’t muted or excluded during the split. Some multi-track editors let a cut apply to video only by accident.
- Deleted footage you actually needed? Undo (Ctrl+Z or Cmd+Z) or reload from your saved original. This is exactly why you never overwrite the source file.
- Upload or export keeps failing? Try a smaller export resolution first, or move the job to a desktop tool if your file is unusually large or high bitrate.
How to Cut Video in Kudoflix
Kudoflix runs the same core steps as any editor, streamlined for people who don’t want to learn software: open the browser editor, upload your clip, then use the trim handles or split tool to mark what stays and what goes.
- No download or install; the whole edit happens in the browser tab you already have open.
- A library of templates, transitions, and effects if you want the cut clip to look polished, not just shorter.
- Built for fast processing, so exports don’t sit in a queue while you wait.
Because everything runs server-side rather than through installed software, the workflow stays consistent whether you’re on a laptop or a lower-powered machine. If you’re starting from zero, the beginner’s editing walkthrough covers the first-clip basics, and the online editor itself is where you’ll actually make the cut.
Managing Cuts Across Multiple Timeline Tracks
Once you’re working with more than one track, cutting gets more complicated than a single trim. A typical multi-track project has separate lanes for video, background music, voiceover, and maybe overlay text or a logo, and a cut on one track doesn’t automatically apply to the others.

The core rule: decide whether your cut is a ripple edit or a simple delete before you make it. A ripple edit shifts everything after the cut point earlier to close the gap, but it only does that on the track you’re editing unless you’ve locked or grouped tracks together. Cut two seconds out of your video track without locking, and your music track will drift out of sync with the visuals from that point forward.
Most editors offer a “lock” or “sync” toggle for exactly this reason. Turn it on before cutting if you want video, audio, and text to move together. Turn it off when you specifically want to trim silence out of a voiceover track without touching the video underneath it.
For longer projects, like assembling a highlight reel from hours of raw footage, editing guides built around wedding videography recommend isolating the strongest moments first, cutting the filler around them, then building a single highlights timeline from the surviving clips rather than trying to trim the full-length recording in one pass. That approach to multi-cut editing scales down fine for a birthday video or a school recital, too.
The Trim-First Instinct Beats Overplanning
You don’t need to storyboard a 30-second Instagram clip or learn ripple edits before you’ve made your first cut. Open the file, drag the handles, export. Learn the advanced techniques only once a project actually demands them.
Where conventional guides fall short is treating every cut like a film school exercise. The real skill isn’t mastering rolling edits; it’s knowing when a two-minute phone trim is enough and when a project actually needs a timeline, multiple tracks, and export-setting discipline. A family clip for a group chat and a highlight reel for a client are different jobs wearing the same word: “cut.”
Prioritize speed for anything short and disposable, and reserve precision tools for anything you’ll watch back more than once. No-download browser editors earn their keep here because they remove the barrier between “I have a clip” and “I have a finished clip,” which is where most people actually get stuck.
— Mandrixx
Try Kudoflix for Your Next Quick Edit
You’ve just read how to trim, split, and manage cuts across timelines using whatever tool you had open. Kudoflix skips the part where you hunt for the right software: no install, no waiting on a download bar, just a browser tab and your file. That matters most for the exact readers this guide is written for, people who need a clean cut today, not a new skill set.
Beyond trimming, Kudoflix adds templates, transitions, and effects if you want your cut clip to look finished rather than merely shortened, which is where phone editors and bare-bones online trimmers tend to fall short. Family clip, business update, or social post, the workflow stays the same: upload, trim or split, export.
See what’s possible on the use cases page, then open the online editor and cut your first clip.
Sources
Recommended