

Pick your best 20 to 30 clips, cut them into a story with one hero moment per stop, layer in music and short captions, then export at the size your platform wants and drop a private link in the group chat. Do it in a browser with something like Kudoflix, and you can go from raw footage to a video your friends actually finish watching in under an hour.
TL;DR:
- Using structured formats such as chronological, location-based, or thematic helps maintain viewer engagement by focusing on key hero moments for each chapter.
- Gathering footage from all sources and organizing it in a dedicated folder before editing saves time and ensures compatibility with MP4 format.
- Starting with a rough cut focusing on hero moments and layer editing with b-roll, titles, and color correction produces a more dynamic and cohesive final video.
- Audio quality is crucial; fixing noise issues and adding ambient sound or royalty-free music enhances viewer retention and emotional impact.
- Export videos in platform-appropriate aspect ratios and lengths, using private links for close sharing and customizing exports for different social media platforms.
Table of Contents
- How to make a video of my trip and share with my friends: the fast workflow
- How do you plan a trip video’s story?
- Gathering footage from phones, cameras, and everyone else’s devices
- What’s the simplest editing workflow for beginners?
- Fixing audio and picking music that won’t get your video muted
- What format and length should you export for each platform?
- What’s the best way to share your finished video with friends?
- How Kudoflix speeds up the whole process
- What’s the one trick worth remembering
- Try the no-download way to finish your trip video tonight
- Sources
How to make a video of my trip and share with my friends: the fast workflow
Every good trip video follows the same five moves, whether you shot on an iPhone or a drone. Skip the overthinking and just work the list.
- Collect and back up everything. Pull footage off every phone, camera, and drone card the day you get home, before anyone deletes anything.
- Choose one structure and pick 1 to 3 hero moments. Decide if the video runs chronologically, by location, or by theme, then flag your best shot from each chapter.
- Rough cut, then tighten. Lay down the hero moments first, cut the fat, then drop in b-roll and titles to fill gaps and keep energy up.
- Fix the audio and add music. Level out sound spikes, mask wind noise, and lay a royalty-free track underneath.
- Export for where it’s going and share the link. Match the aspect ratio and length to the platform, then send it as a private link or post it directly.
That’s the whole arc. Everything below just fills in the details so each step actually works.
How do you plan a trip video’s story?
A trip video without structure feels like someone dumping their camera roll on you, and viewers check out fast. Story-driven editing with a clear narrative thread and defined hero moments keeps people watching instead of scrolling past.
Three structures cover almost every trip:
- Chronological. Day one to day seven, in order. Works well for road trips and multi-stop itineraries.
- Location by location. One chapter per city or site, regardless of when you visited. Cleaner for trips with distinct destinations.
- Thematic. Group by food, people, or landscapes instead of time or place. Great for trips heavy on one kind of moment, like a food-focused trip to a new city.
Pick a hero moment for each chapter, the one shot that makes someone say “wait, go back.” Everything else in that section supports it. As for pacing, keep most shots short during action sequences, then let a genuinely beautiful moment (a sunset, a hug at the airport) breathe longer. Cutting too fast during your best shot is a common mistake first-time editors make.
Pro Tip: Use captions as tiny stories instead of labels. Skip “Day 3, Lisbon” and try “We got lost for two hours and found the best pastry of the trip.” A caption that adds a sensory or emotional detail keeps viewers reading and watching at the same time.
Gathering footage from phones, cameras, and everyone else’s devices
Trip footage lives in five different places by the time you’re home: your phone, your partner’s phone, someone’s GoPro, a drone card, and three group texts full of clips your friends sent. Getting it all in one spot before you touch an editor saves hours later.
For direct transfers, use whatever’s fastest for the devices involved:
- AirDrop for anything Apple to Apple, no cables or accounts needed.
- Google Photos or Dropbox shared albums when the group has a mix of Android and iPhone.
- A QR code linked to a shared folder works well for larger groups, since guests can upload straight from their phone without downloading an app.
Once everything’s in one place, create a simple folder structure by day or location, and copy the whole thing to a second location immediately, an external drive or a cloud backup, before you start editing anything. MP4 remains the most broadly compatible format across phones, drones, and action cameras, so convert oddball formats early rather than mid-edit. If multiple people filmed the same moment, sync by ear using a shared sound (a countdown, a clap, a burst of laughter) rather than fighting with timecodes.
What’s the simplest editing workflow for beginners?
Start with a rough cut. Drop your hero moments onto the timeline first, in order, with no polish. Editing that starts with a rough cut and then tightens for pace tends to produce a far more watchable film than trying to perfect one clip at a time. Once the skeleton is there, cut anything that doesn’t move the story forward, even if it’s a technically nice shot.
From there, build it out in layers:
- Add b-roll to smooth the cuts. Walking shots, hands on a map, food closeups, anything that bridges two hero moments without feeling like a hard jump.
- Use transitions sparingly. One or two whip pans or fades per video is plenty; a different transition on every cut reads as amateur.
- Keep titles short and consistent. Pick one font for titles and one style for lower thirds (the small text near the bottom of the screen), and reuse them the whole video.
- Adjust color and exposure to match clips. A quick warmth boost or brightness fix unifies footage shot in different light throughout the day.
Mixing b-roll with action shots and keeping individual shots short is one of the simplest rules in editing, and it’s the one beginners skip most often because it feels like extra work.
Pro Tip: Watch your rough cut once at double speed. Anywhere you get bored even at 2x is a scene that needs to be shorter or cut entirely.
Fixing audio and picking music that won’t get your video muted
Audio problems sink more trip videos than bad footage does. Wind noise, uneven levels between clips, and a phone mic that picked up someone’s backpack rustling all pull attention away from the visuals fast. A light noise reduction pass and normalizing levels across clips fixes most of it in minutes, since audio quality is one of the biggest factors in whether people stay through a video or click away.
Keep a bit of real ambient sound under your hero moments, waves, market chatter, a friend laughing, since it’s what makes the video feel like you were actually there. Music works best filling the gaps between those moments, smoothing transitions and carrying scenes that don’t have strong natural sound; for expert tips on optimizing your videos, check out this video SEO guide. For sourcing, stick to royalty-free libraries built for social use; platforms routinely mute or strip audio from videos using unlicensed commercial tracks, which is the fastest way to lose your video’s soundtrack after you’ve already shared it.

What format and length should you export for each platform?
Export settings decide whether your video looks sharp or gets cropped weirdly on someone’s phone. Match the aspect ratio to where the video is going, not the other way around.
- 16:9 at 1080p or 4K for YouTube and other long-form platforms.
- 9:16 at 1080×1920 for Instagram Reels and TikTok.
- 1:1 for standard Instagram feed posts.
On runtime, aim for 5 to 10 minutes for a full YouTube-style recap, 2 to 4 minutes for a family highlight reel, and under 60 seconds for anything meant to hook viewers on short-form. Tailoring one exported file per platform beats uploading the same file everywhere and hoping it plays fine. For codec, MP4 with H.264 works everywhere; H.265 gives smaller files at similar quality if your export tool supports it. Name your exports something you’ll recognize in three months, like “Portugal_2026_Reel_Final,” not “video3.mp4.” Kudoflix’s engaging-formats guide breaks down which sizes each platform actually favors right now.
What’s the best way to share your finished video with friends?
Once the video’s done, how you share it matters almost as much as how you made it. A private link keeps the video off public feeds; a social post gets it in front of more people faster.
- Private links or cloud albums (Google Drive, unlisted YouTube links, or a Kudoflix share link) work best for family and close friends who just want to watch, not scroll past it in a feed.
- Social posts make sense when you want a wider audience or you’re building a following around your trips; map-based reels and route-based generators are a fast option if you want a quick companion piece showing where you actually went.
- QR uploads or a shared folder request let friends who filmed on the trip send you their footage after the fact, so you can add it to a “director’s cut” later.
Set link expiration if the video includes people who’d rather it not live online forever, and always ask before tagging someone’s face in a public post. Add simple captions if you’re sharing publicly. It helps accessibility and keeps people watching with the sound off, which is most people scrolling on their commute.
How Kudoflix speeds up the whole process
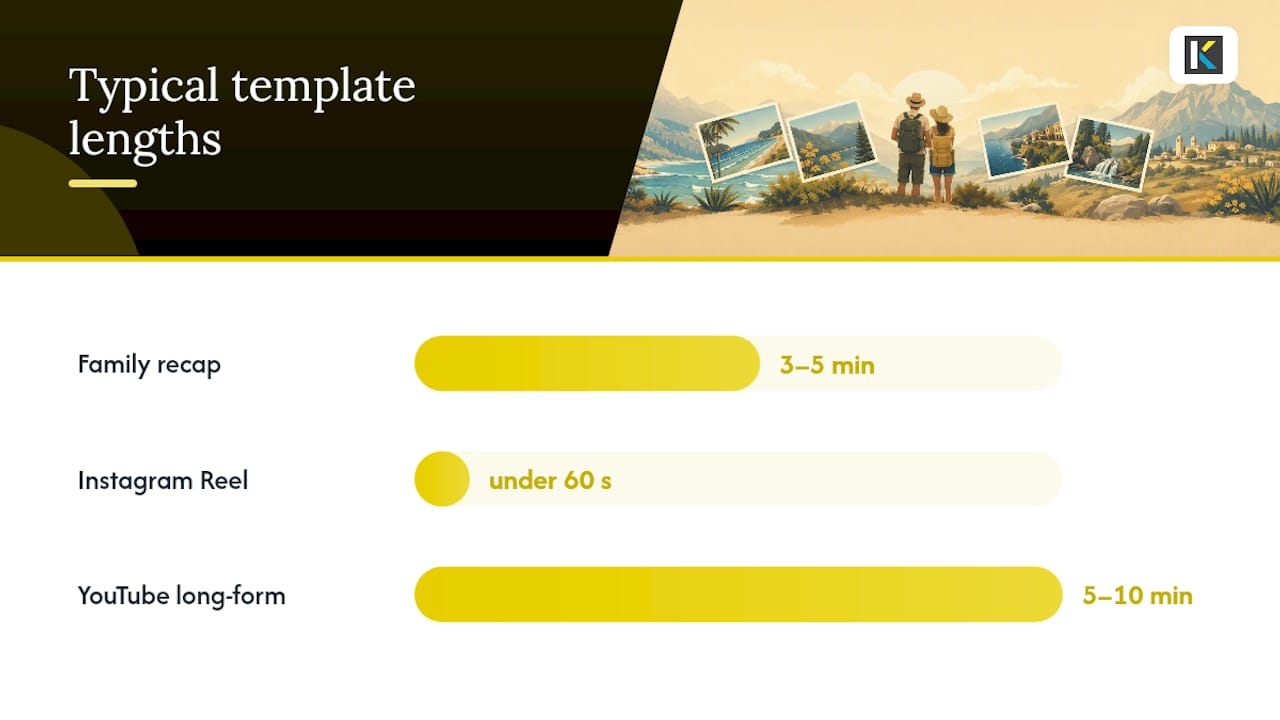
Downloading and learning traditional editing software is often the actual reason trip videos never get made. A browser-based editor removes that entire step, no install, no waiting on renders to finish overnight, no format compatibility puzzle when your friend’s drone footage won’t open.
Kudoflix’s travel video editor comes with templates built for exactly this workflow:
- Family recap template, built for the 3 to 5 minute highlight reel you send to relatives.
- Instagram Reel template, pre-sized at 9:16 with pacing built for short attention spans.
- YouTube long-form template, structured for chapters if you’re documenting a longer trip.
The workflow is the same regardless of template: import your clips, apply the template, adjust the trims and swap in your own music, then export and share the link.
| Template | Best for | Typical length |
|---|---|---|
| Family recap | Sharing with relatives and close friends | 3 to 5 minutes |
| Instagram Reel | Quick public share, algorithm-friendly | Under 60 seconds |
| YouTube long-form | Full trip documentation | 5 to 10 minutes |
What’s the one trick worth remembering
Pick one song before you touch your footage, then edit your cuts to hit on its beats. That single move makes a first attempt feel intentional instead of thrown together, and it’s the fastest way to shortcut good pacing without studying editing theory.
If you’ve never finished a trip video before, don’t start with your whole two-week itinerary. Build a 30 to 60 second highlight reel from six to ten clips first. A short starter project is the surest way past perfectionism, and finishing something small teaches you more than half-finishing something huge. Once that one’s done and your friends have actually watched it, the longer version gets a lot easier.
— Mandrixx
Try the no-download way to finish your trip video tonight
You’ve got the workflow. What usually kills it is the software: a download that takes forever, a trial version that won’t export without a watermark, an interface that buries the one tool you need under three menus. Kudoflix’s online editor skips all of that, since it runs entirely in your browser and gets you from imported clips to a finished export without installing anything.
Start from a ready-made travel template, drop in your footage, swap the music, and export at whatever size your friends are actually going to watch it. Open the editor, pick a template, and have something shareable by tonight.
Sources
- How to Create a Travel Video: The Ultimate 2026 Guide to Cinematic Storytelling
- How to Combine Multiple MP4 Clips Into One Travel Video – Paliparan
- Publishing Your Awesome Adventure Footage: 10 Simple Rules for Making Share-Worthy Trip Videos
- Turn your trips into 3D travel reels. Share every journey.
Recommended