The fastest reliable way to censor a video is a browser-based editor that auto-detects faces, plates, or on-screen text, then lets you confirm and adjust before export. Draw a blur, pixelate, or mask over anything the detector missed, mute or bleep the audio, and track the region across frames. Some browser-based editors handle this without downloads, which matters when you’re on a deadline.
TL;DR:
- Browser-based editors with auto-detection speed up censored video creation but still require manual adjustments for missed regions or tracking errors.
- Blur, pixelate, and mask techniques each serve different levels of censorship, with pixelation and masks providing more legible protection for sensitive data or minors.
- Exported videos should be previewed at full resolution to ensure censorship holds up, especially after compression or cropping differences across platforms.
- Manual keyframes and careful masking improve tracking accuracy for moving subjects, reducing missed frames or drift in dynamic footage.
- Planning filming to avoid capturing sensitive content minimizes editing time and legal risks, especially when dealing with identifiable information or minors.
Table of Contents
- Visual and Audio Censorship Methods: Blur, Pixelate, Mask, and Bleep
- How Do You Censor a Video Step by Step Online?
- Tracking Moving Subjects and Fixing Tracking Errors
- Pre-Production and QA Tips That Save Editing Time
- Formats and Export Considerations
- Legal and Ethical Considerations of Video Censorship
- Software and Tools Comparison for Video Censorship
- Handling Censorship Across Social Media and Professional Video
- What Editors Get Wrong About Censoring Footage
- Getting Started With Kudoflix for Fast Video Censoring
- Sources
- FAQ
Visual and Audio Censorship Methods: Blur, Pixelate, Mask, and Bleep
Each censoring technique does a different job, and picking the wrong one either leaves footage too recognizable or makes your video look chopped up for no reason. Understanding what each method actually hides, and how strongly, is the difference between a clean edit and a video you have to redo.
- Blur softens a region using a gradient effect. It’s fast to apply and looks natural, but a strong blur setting on a small face can still leave enough detail for someone who already knows the person to identify them.
- Pixelation breaks the region into visible blocks. It reads as more deliberately “censored” than blur, which is exactly why news broadcasts default to it. It’s also harder to reverse than a light blur.
- Hard mask or black box covers the area completely. Nothing gets through, which makes it the right call for extremely sensitive content like documents, minors’ faces, or self-harm imagery.
- Stickers and overlays replace a region with an image or emoji. They’re less clinical than a black box and work well for casual social content, though they draw more visual attention to what you’re hiding.
Audio needs the same range of options. Muting simply drops the sound to silence, which works for background chatter but creates an awkward dead patch if it happens mid-sentence. A bleep tone signals “something was said here” without pretending nothing happened, the classic reality-TV approach. Replacing the clip with music or ambient sound is the smoothest option for viewers, since it fills the gap instead of leaving a hole.
Match the method to the scenario. Bystanders in a street interview usually only need a light blur for anonymity. License plates and screen text with personal data call for pixelation or a mask, since partial detail can still be legible. Platform moderation also factors in here: some social apps flag videos with visible weapons, drug references, or graphic injury even when blurred, so a full mask is safer if you’re unsure how a platform’s detection tools will read the frame.
How Do You Censor a Video Step by Step Online?
Here’s the workflow that gets a censored, export-ready file done in one sitting instead of three:
- Upload your clip or paste a link. Most browser editors accept direct file uploads plus links from cloud storage.
- Run auto-detection if the tool offers it. Automatic detection scans for faces, plates, and sensitive text so you’re reviewing flagged regions instead of scrubbing every frame by hand.
- Draw regions for anything the detector missed. Small faces in the background, partial plates, or a screen glimpsed for half a second often need a manual box.
- Choose your effect: blur, pixelate, or mask. Turn on auto-track for moving subjects, or add manual keyframes where tracking loses the target.
- Scrub the entire timeline once more before exporting. Auto-detection is a first pass, not a guarantee, and a missed frame at 24 frames per second is easy to overlook on a quick preview.
- Export the final file with a clear, versioned name. Something like
interview_censored_v2_final.mp4prevents you from accidentally distributing an uncensored draft later.
Pro Tip: Preview your export at the actual resolution you’re delivering, not the editor’s default preview size. A blur that looks solid at 480p can thin out and become semi-transparent once the video’s upscaled or viewed on a large screen. Keep your uncensored master file in a locked or private folder, separate from anything you share.
Tracking Moving Subjects and Fixing Tracking Errors
Auto-track works well when a face or plate stays a decent size and mostly faces the camera. It struggles with small, distant subjects, quick profile turns, and anything that gets partially blocked by a person or object walking through frame. Those occlusions are the number one cause of a blur “slipping off” a face for a few frames.
Manual keyframes fix what auto-track can’t handle alone. Add a keyframe wherever the subject changes position or size significantly, and let the software interpolate the motion between points.
- Enlarge the mask slightly beyond the visible edge of the subject to cover motion blur and small tracking drift.
- Feather the mask’s edges so it doesn’t look like a hard-edged sticker glued onto moving footage.
- Add a fallback static mask over frames where the subject is briefly occluded, rather than trying to force the tracker through it.
- For crowds or multiple vehicles, censor the most visible or camera-facing subjects first, then work outward instead of tackling every target at once.
Clips with a lot of movement, think street footage or dashcam video, almost always need a second review pass focused only on tracking accuracy, separate from your first pass for coverage.
Pre-Production and QA Tips That Save Editing Time
The cheapest way to censor a video is to never film the sensitive part in the first place. Framing shots to avoid capturing bystanders’ faces, visible documents, or readable screens up front eliminates editing work entirely.
- Record separate audio tracks or keep a rough transcript, so you can locate exactly where a name or address gets said instead of scrubbing the whole file by ear.
- Run an automated detection scan as your first editing step, then do a manual quality check pass at the end, never skip the second one.
- Export one clean, censored delivery file, and restrict access to the uncensored master.
YouTube’s own creator guidance makes the same point: planning edits and privacy decisions early avoids the far more time-consuming process of fixing them after the fact.
Formats and Export Considerations
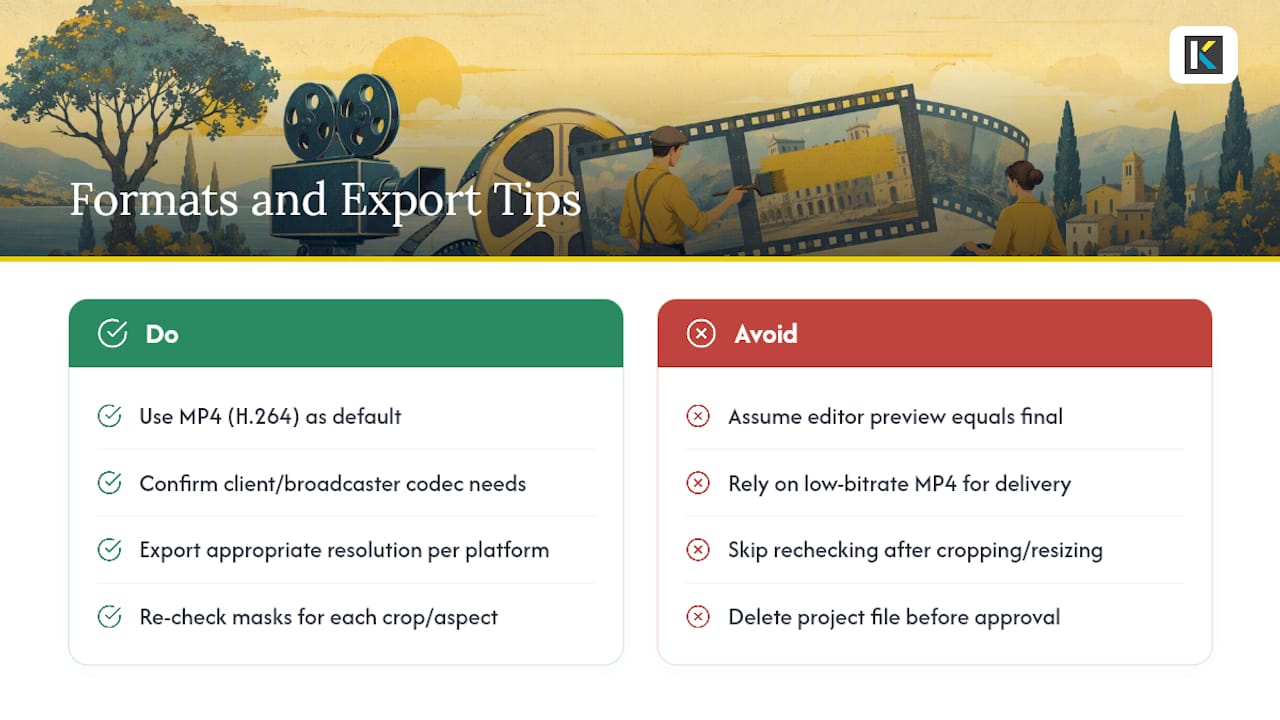
Your export settings matter almost as much as the censoring itself. A mask that looks solid in your editor’s preview can degrade once the file gets compressed for upload, especially at lower bitrates where blocky pixelation can blend into standard video compression artifacts and become less obvious, or paradoxically more visible as banding.
MP4 with H.264 encoding remains the safest default for compatibility across YouTube, Instagram, and most business platforms. If you’re delivering to a client or broadcaster, check whether they need a specific codec or container, some professional workflows still expect ProRes or a higher-bitrate MOV file, which handles fine detail in blurred regions more cleanly than a heavily compressed MP4.
Resolution matters too. Exporting a censored clip at a lower resolution than your source footage can actually help hide artifacts around mask edges, but it also softens everything else, so it’s a trade-off rather than a free fix. If your video is heading to multiple platforms with different aspect ratios (a square Instagram version and a widescreen YouTube version), re-check every masked or blurred region in each crop. A face that’s safely covered in 16:9 might sit outside the mask entirely once you crop to 9:16 for a Reel or Short.
Always keep your project file, not just the exported video, until you’re certain no reshoot or platform resubmission is needed. If a platform later requests changes, re-editing from the project file is minutes of work. Starting over from the raw footage is not.
Legal and Ethical Considerations of Video Censorship
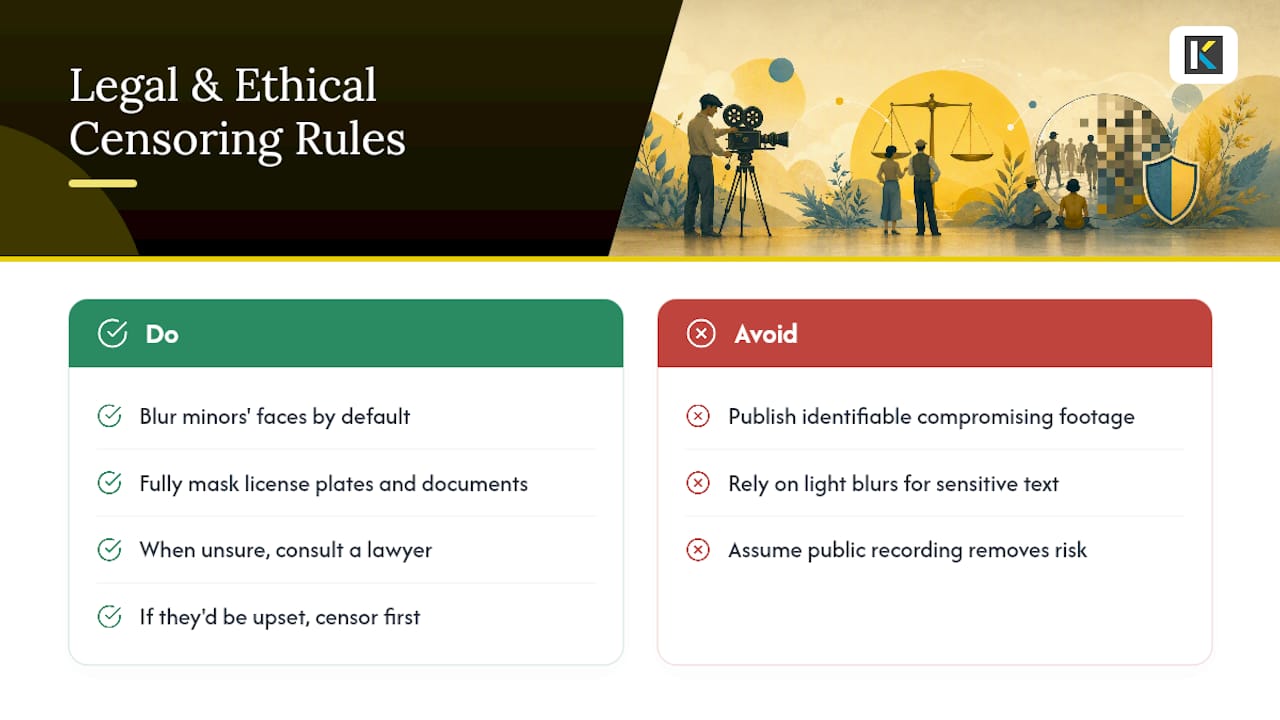
Censoring a video is sometimes a legal requirement, not just a courtesy. Recording bystanders in public generally falls under lower privacy expectations in the United States, but publishing footage that identifies someone in a compromising or embarrassing context can still expose you to a privacy or defamation claim depending on your state’s laws. When in doubt about a specific situation, that’s a question for a lawyer familiar with your state, not a general guide.
Minors deserve stricter treatment than adults by default. Many creators blur children’s faces automatically, regardless of context, simply because consent standards around minors are tighter almost everywhere.
License plates, addresses, and visible documents carry a different risk: identity theft and stalking, not just embarrassment. Treat any frame with a readable plate or document the same way you’d treat a face, mask it fully rather than lightly blurring it, since a few extra pixels of visible text can be enough to read a name or number.
Ethically, the honest question to ask before publishing is simple: would the person in this footage be upset if they saw it right now, in this context, with this audience? If the answer is yes, censor first and ask questions later. That standard covers most gray areas better than any specific rule could, because it forces you to think about the actual person on screen rather than just the legal minimum.
Software and Tools Comparison for Video Censorship
Editors generally fall into three camps for censoring work: full desktop NLEs like Premiere or Resolve, mobile apps, and browser-based editors.
Desktop software gives you frame-accurate manual control, which is genuinely the most precise option available. The tradeoff is time: manual masking in a traditional NLE is accurate but slow, since every region typically needs hand-tracked keyframes with no automatic detection layer underneath.
Mobile apps split into two tiers. Some, like CapCut, support manual blur overlays you place and drag yourself. Others, including many platform-native editors like iMovie or TikTok’s built-in tools, lack reliable automatic face-blur features entirely, which pushes creators toward a separate tool anyway.
Browser-based editors sit in the middle and, for most everyday censoring jobs, cover the ground fastest. Auto-detection handles the repetitive scanning, manual tools cover the misses, and there’s no render time lost to exporting a project file into a separate app. Several browser-based editors fit this category, working entirely without installation, which matters if you’re editing from a shared or work computer where you can’t install software.
Handling Censorship Across Social Media and Professional Video
A quick Instagram Story and a client deliverable need different levels of censorship care, and treating them the same way wastes effort on one end or risks embarrassment on the other.
Social clips, Reels, TikToks, casual uploads, usually tolerate a lighter touch. A quick blur pass on faces and a mute over a stray comment is often enough, since the audience expects informal footage and the platform’s own moderation catches the worst violations anyway.
Professional and client-facing video demands a stricter pass. Corporate training footage, real estate walkthroughs, and interview-based content often include visible screens, whiteboards, ID badges, or documents that need a full mask rather than a blur. Clients also tend to request revisions, so keeping your project file editable (rather than flattening everything at export) saves you from re-tracking the same face twice.
Livestream and near-live content is the hardest case, since there’s no time for a full review pass before publishing. If you’re streaming anything with a real risk of sensitive content appearing on screen, plan your framing in advance rather than relying on real-time censoring tools, which are far less reliable than a post-production pass.
What Editors Get Wrong About Censoring Footage
Most guides treat censorship as a purely mechanical task: pick a tool, draw a box, done. The harder call is deciding how much context to preserve. A heavy blur over an entire background protects privacy completely but can strip a scene of meaning the viewer actually needed. A lighter touch keeps the story intact but leaves room for someone determined enough to identify a face anyway.
Automated detection earns its place here precisely because it removes the tedious part, hunting frame by frame, without removing your judgment from the equation. Treat it as a first pass that surfaces candidates, not a final decision-maker. The editors who skip the human review step are the ones who end up re-uploading a corrected version a day later.
— Mandrixx
Getting Started With Kudoflix for Fast Video Censoring
Kudoflix runs entirely in your browser, so there’s no software to install and no render queue eating up your afternoon while you wait to censor a ten-second clip. You get masking and blur effects, pixelation for plates and screens, and templates that speed up common censoring setups instead of building every mask from scratch.
Getting a clip censored takes three steps: open the online video editor, upload your footage, then add a blur or mask over the region you need to cover and export. The use-case examples show how creators handle everything from interview anonymity to covering visible text on documents, which is worth a look if you’re not sure which effect fits your footage. If your last video editor left you wrestling with a cluttered interface just to hide one face for three seconds, this is the faster way to do it.
Sources
- Video editing tips – YouTube Help
- How to Censor a Video Online: Free Tools + Step-by-Step Guide 2026
- Video Blur & Censor Tool — Tembrica
FAQ
How Do I Blur Something in a Video?
Upload your clip to a browser editor, draw a region over the area you want hidden, and apply a blur or pixelate effect. Turn on auto-track so the effect follows the subject as it moves through the frame.
How Do I Bleep Out Audio in a Video?
Select the section of audio you want to censor, then replace it with a bleep tone or mute it entirely. A bleep signals that something was said without playing it, while a mute leaves silence, so pick based on how obvious you want the edit to be.
How Do I Censor a Video on an iPhone?
Apple’s built-in iMovie app lacks a reliable face-blur feature, so most creators use a separate mobile app or a browser-based editor like Kudoflix instead, uploading the clip directly from their phone’s camera roll.
Is There a Tool That Automatically Censors Videos?
Yes. Tools that offer automatic face and plate detection can scan footage and apply tracked blurs without manual work on every frame, but a human review pass is still needed to catch anything the detector misses, especially small or partially hidden subjects.
Recommended