Video cropping removes pixels from the edges of a frame to change its shape, its focus, or both. That’s the entire mechanic. Everything else, from Instagram’s auto-reframe to Hollywood pan-and-scan DVD transfers, is a variation on cutting away pixels you don’t need and keeping the ones you do.
Three uses cover almost every reason you’d reach for a crop tool:
- Aspect-ratio conversion — turning 16:9 landscape footage into 9:16 vertical for TikTok, Reels, or Shorts.
- Subject-preserving reframing — following a speaker or moving subject so they stay centered as the frame shape changes.
- Removing unwanted borders — cutting black bars, watermarks, or accidental framing errors from raw footage.
Modern automated tools handle this with spatio-temporal saliency, a technique that tracks where viewer attention lands across a sequence of frames instead of just one still image. Get the pixel math wrong, though, and you’ll hit chroma subsampling artifacts, color shifts caused by misaligned crop offsets in compressed video formats. Kudoflix builds both the automated and manual sides of this into one workflow, which is where this gets practical rather than academic.
Key Takeaways
Video cropping works by removing edge pixels according to precise coordinates, and the best results come from combining spatio-temporal saliency automation with targeted manual refinement.
| Point | Details |
|---|---|
| Cropping is coordinate math | Width, height, x, and y define exactly which pixels stay; origin sits at the top-left corner. |
| Saliency plus smoothing wins | Spatio-temporal saliency tracks attention across frames, then LOESS or lowpass smoothing removes jitter. |
| Chroma subsampling needs even offsets | Odd-valued crop offsets on subsampled formats like 4:2:0 can shift chroma planes and cause color fringing. |
| Automate first, refine manually | Run auto-reframe for the first pass, then manually keyframe only the shots where it visibly struggles. |
| Kudoflix combines both approaches | Kudoflix pairs auto-reframe presets with manual keyframing and easing controls in one browser-based editor. |
Table of Contents
- How Does Video Cropping Work at the Pixel Level?
- Should You Crop or Use Seam Carving Instead?
- How Do Automated Cropping Algorithms Choose What to Keep?
- How Do You Manually Crop and Keyframe a Shot?
- Which Tools Handle Cropping Best in Practice?
- What Mistakes Ruin an Otherwise Good Crop?
- How Do You Speed Up Automated Cropping Without Losing Quality?
- How Does Kudoflix Handle Cropping and Auto-Reframe?
- Where Does Cropping Fit in a Modern Editing Workflow?
- Try Cropping and Auto-Reframe Without the Learning Curve
- Sources
How Does Video Cropping Work at the Pixel Level?
Every crop operation reduces to four numbers: width, height, x, and y. The x and y values mark the top-left corner of your new frame, measured in pixels from the original frame’s top-left origin. Width and height define how far right and down the crop window extends from that point. That’s it. A 1920×1080 frame cropped with width=1080, height=1080, x=420, y=0 gives you a centered square, pulled from the middle of a landscape frame.
Implementations don’t always do the work you’d expect, though. When a crop request asks for the entire original frame, meaning no pixels actually need removing, the GStreamer videocrop element switches into pass-through mode and copies the frame untouched rather than running redundant calculations. That’s a real efficiency detail worth knowing if you’re building or debugging a pipeline, not just using one.
The format of your video changes how that pixel removal actually happens under the hood:
- Packed formats store all color channels for a pixel together in memory, so a simple format needs only straightforward row-and-column trimming.
- Complex packed formats interleave channels in patterns that complicate direct pixel slicing.
- Planar formats store each color channel (Y, U, V) in a separate memory block, so cropping requires adjusting each plane independently, often at different resolutions for chroma planes.
- Semi-planar formats split luma and combined chroma into two planes, needing a hybrid approach.
| Format family | Crop complexity | Key handling requirement |
|---|---|---|
| Packed, simple | Low | Direct row/column trim |
| Packed, complex | Medium | Channel-order-aware trimming |
| Planar (e.g., I420) | High | Per-plane crop at correct chroma resolution |
| Semi-planar | Medium-high | Separate luma/combined-chroma handling |
The GStreamer source implementation shows this concretely: its code branches on format type to decide whether it can transform in place using crop metadata or needs a full frame copy with per-plane logic.
Pro Tip: Snap your crop offsets to even numbers when working with chroma-subsampled footage like 4:2:0. Odd-valued left or top offsets can shift chroma planes out of alignment with luma, producing subtle color fringing that’s easy to miss on a small preview but obvious on a big screen.
Should You Crop or Use Seam Carving Instead?
Cropping wins whenever preserving subject geometry matters more than keeping every bit of the original frame. Seam carving and mesh warping take a different approach entirely: instead of cutting the frame, they stretch or remove low-importance pixel “seams” to resize the image while keeping high-importance content intact.
The problem is that stretching introduces distortion. A face near a seam-carving boundary can warp subtly, and moving objects can appear to bend or smear across frames. Cropping never does this because it only removes regions; it never reshapes what remains. That’s why research on video retargeting consistently treats cropping as the safer default when semantic accuracy is the priority.
Four approaches show up repeatedly in retargeting workflows:
- Cropping — remove edge pixels, keep remaining geometry intact.
- Seam carving / mesh warping — resize by stretching or removing low-saliency regions, risking distortion.
- Padding / letterboxing — add black bars instead of removing content, preserving everything but wasting screen space.
- Pan-and-scan — move a fixed-size crop window across a frame over time, a manual predecessor to today’s automated reframing.
| Method | Suitability for social/vertical output | Semantic distortion risk | Temporal coherence |
|---|---|---|---|
| Cropping | High | Low | Depends on smoothing |
| Seam carving / warping | Low to medium | High | Often unstable |
| Padding / letterboxing | High | None | Perfect (static) |
| Pan-and-scan | Medium | Low | Manual effort required |
Choose cropping when you need clean output for a platform spec and can’t afford geometric distortion. Skip it only when the peripheral content genuinely matters, an infographic with data at the frame edges, for instance, where letterboxing preserves everything instead.
How Do Automated Cropping Algorithms Choose What to Keep?
Automated smart cropping runs through a repeatable pipeline, and once you see the steps laid out, the “magic” behind auto-reframe tools stops feeling mysterious:
- Compute per-frame saliency and run face/object detection to find where attention naturally lands.
- Cluster salient regions using a method like HDBSCAN to filter noise and group meaningful attention areas together.
- Select the main cluster’s center as the frame’s attention point.
- Compute a crop window per frame, constrained to your target aspect ratio, centered on that attention point.
- Segment the video into shots so smoothing doesn’t blend crop paths across cuts.
- Smooth the crop path within each shot using LOESS regression or a lowpass filter to eliminate jitter.
- Interpolate any skipped frames back into the full sequence.
- Output the reframed video.
The reason this beats naive frame-by-frame cropping comes down to spatio-temporal saliency: combining spatial attention (where in this frame is interesting) with temporal persistence (has this been interesting for several frames, or is it a one-frame flicker). Research on saliency-driven reframing treats that temporal dimension as essential, not optional, because a crop window that jumps every time a new object briefly enters frame looks worse than one that ignores minor distractions.
Published implementations lean on specific tools to make this work: UNISAL for saliency prediction, HDBSCAN for clustering, and LOESS smoothing per shot, all detailed in the ICIP 2021 smart-cropping paper. Dynamic-programming approaches, like the pan-zoom-scan system from Deselaers et al., use penalty functions and early-traceback algorithms to derive a smooth path that balances staying centered on the subject against staying within a reasonable zoom range.
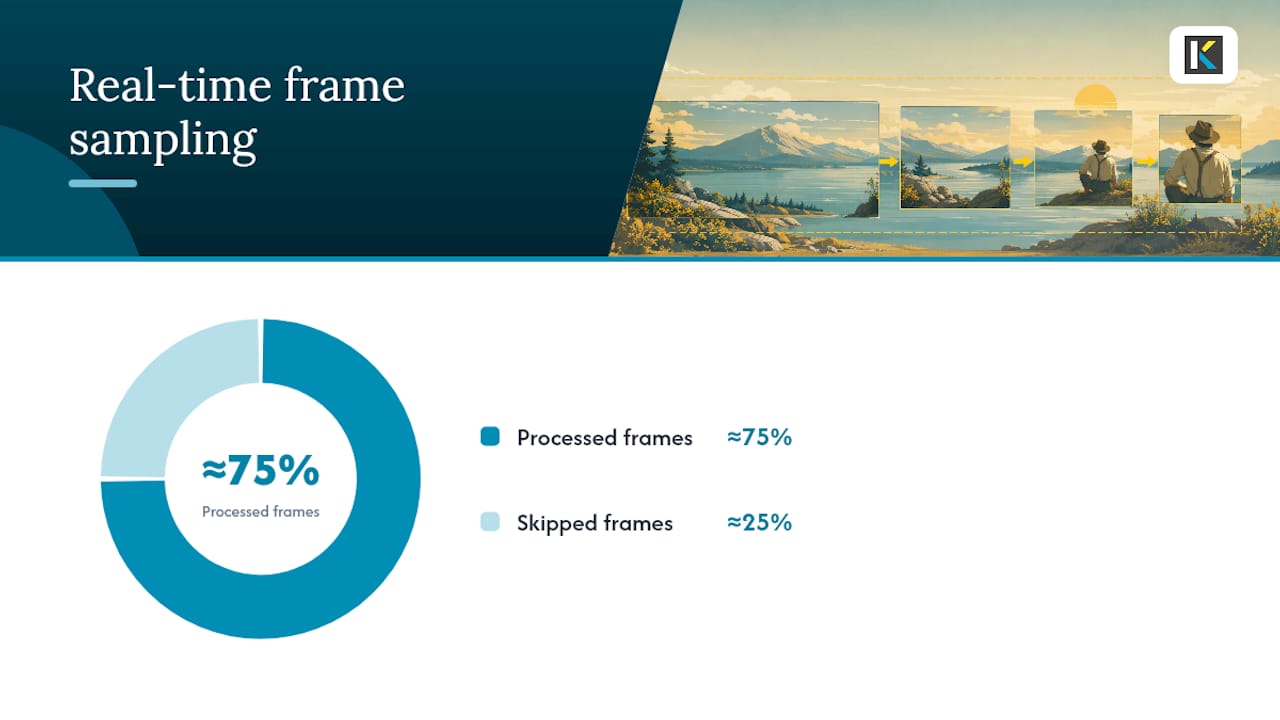
Pro Tip: If you’re processing footage near real time, skip roughly every 4th frame for saliency computation and interpolate the rest. Published experiments found this produces nearly identical visual results while cutting compute cost meaningfully.
How Do You Manually Crop and Keyframe a Shot?
Automated tools handle most footage well, but tricky shots, two people talking with neither centered, a subject that darts to the frame edge, still benefit from manual control. Here’s the sequence that works in any timeline-based editor:
- Choose your target aspect ratio first (9:16, 1:1, 4:5), since it constrains every crop decision after.
- Mark the safe area and identify your primary subject before touching the crop box.
- Set an initial crop box position for the shot’s opening frame.
- Add keyframes at points where the subject moves meaningfully, adjusting the crop box position at each.
- Apply easing curves between keyframes rather than linear movement, so the crop glides instead of snapping.
- Test the result on your highest-motion segment first, since that’s where jitter and lag show up fastest.
- Polish with stabilization or added mattes if the crop leaves rough edges.
Easing matters more than most editors realize. A linear keyframe move looks mechanical because real camera operators (and real attention) don’t move at constant velocity. FFmpeg’s own crop filter documentation treats crop parameters as expressions specifically so they can be driven by non-linear functions across a timeline, not fixed values.
Pro Tip: Nudge your crop slightly ahead of where a subject is heading rather than reacting after they move. This anticipatory shift is what separates smooth-looking reframe work from footage that always feels a half-second behind the action.
Which Tools Handle Cropping Best in Practice?
FFmpeg remains the baseline tool for manual and scripted cropping. The core syntax is crop=w:h:x:y, with the origin at the top-left corner. You can use in_w and in_h in expressions to make crops resolution-independent:
ffmpeg -i input.mp4 -filter:v "crop=in_w/2:in_h:in_w/4:0" -c:a copy output.mp4
That example crops a centered half-width region and copies audio through without re-encoding it, since cropping the video stream always requires re-encoding even when audio doesn’t.
Beyond FFmpeg, two research implementations matter for anyone building or evaluating automated reframing:
- Google AutoFlip combines face and object detection to place crop windows automatically, and its approach is referenced widely as one of the earliest production-grade auto-reframe systems.
- SalCrop adds scene detection, fast saliency prediction, and an adaptive cropping module in one pipeline, and reports outperforming prior methods in its published benchmarks.
Seam carving shows up in some retargeting toolkits too, but it carries real risk in video specifically: distortions that are barely visible in a single still image become obvious once a subject’s face or limb warps across dozens of frames in motion.
| Tool / method | Best use case |
|---|---|
| FFmpeg crop filter | Fixed or expression-driven crops, scripting, batch jobs |
| GStreamer videocrop element | Pipeline integration, pass-through efficiency |
| AutoFlip | Detection-based auto-reframe for social output |
| SalCrop | Saliency-driven adaptive cropping with codec integration |
What Mistakes Ruin an Otherwise Good Crop?
Good cropping comes down to respecting a handful of rules that are easy to state and easy to forget mid-edit.
- Keep headroom above subjects; cropping too tight at the top reads as amateurish even when everything else is fine.
- Keep action inside the safe area, especially for platforms that overlay UI elements near frame edges.
- Snap crop offsets to even-numbered pixel values on chroma-subsampled footage to avoid the color-plane misalignment that odd offsets cause.
- Don’t crop so tight near edges that fast-moving subjects exit frame mid-motion; leave margin for movement you haven’t seen yet.
- Don’t assume one crop box works for an entire shot if the camera or subject moves significantly.
Over-cropping is the most common failure and the hardest to notice while editing on a full-size monitor. A crop that looks fine at your desk can clip a subject’s hand or cut a second speaker out entirely once viewed on a phone screen at the intended aspect ratio.
Pro Tip: Always preview your final crop on your highest-motion clip and check color consistency at full resolution, not a scaled-down preview, before exporting. Subsampling artifacts and edge clipping both hide in low-res previews.
How Do You Speed Up Automated Cropping Without Losing Quality?
Processing every single frame at full saliency resolution is wasteful. Published smart-cropping systems get most of their speed from a few deliberate shortcuts:
- Skip frames during saliency computation (n_skip ≈ 4 in published experiments) and interpolate the gaps before smoothing.
- Process shot-by-shot rather than treating an entire video as one continuous smoothing problem.
- Use early-traceback dynamic programming so the crop path can be finalized without waiting for the full shot to buffer.
- Filter out low-confidence saliency detections using thresholds (reasonable saliency filter thresholds appear in published parameter tuning) before clustering.
Quick wins for CLI or library-based workflows: process a handful of key frames first to validate your saliency model before running a full batch, parallelize shot segments independently since they don’t depend on each other, and use GPU-accelerated optical flow wherever your pipeline supports it, since flow computation is usually the slowest single step.
How Does Kudoflix Handle Cropping and Auto-Reframe?
Kudoflix builds automated reframing and manual crop control into the same browser-based workflow, no downloads, no render waits before you can see a result — a perfect fit for creators mindful of landscape photos on Instagram and other social platform specifics. The platform’s auto-reframe and templates target the exact aspect ratios that TikTok, Instagram, and YouTube expect, so converting a landscape interview into a vertical clip doesn’t require manual math on crop coordinates.
- Auto-reframe detects the main subject and generates a crop path automatically for common social aspect ratios.
- Manual keyframing and easing controls let you override the automatic result shot by shot when a subject moves unpredictably.
- Templates built for platform specs speed up export so you’re not guessing at pixel dimensions for each destination.
The balance that matters here is automation plus a fast manual override, not automation alone. A saliency algorithm will get most shots right, but the two-person interview or the subject who drifts to frame-edge still needs a human glance before export.
Pro Tip: Run the auto-reframe pass first, scrub through the preview at full speed, and only drop into manual keyframing for the specific seconds where the crop window hesitates or overshoots. That targeted fix takes far less time than manually keyframing an entire shot from scratch.
Where Does Cropping Fit in a Modern Editing Workflow?
Automation should handle the first pass on almost every shot now. Spatio-temporal saliency models have gotten good enough that manually keyframing a single-subject interview from scratch is often wasted effort, work an algorithm does in seconds with comparable quality.

Where manual control still earns its place is the edge cases: two speakers trading dialogue with neither one dominant, a subject who exits and re-enters frame, or footage where the “important” content isn’t a face or object at all, like a hand demonstrating a product. Saliency and detection models are trained on faces and moving objects; they don’t reliably understand context the way a human editor glancing at the same frame does.
My honest recommendation: run automated reframing first, always. Then scrub through and manually adjust only the shots where the crop window visibly hesitates, overshoots, or misses something a viewer would obviously want kept in frame. Treat automation as your first draft, not your final answer.
The research direction worth watching is multi-focus segmentation, models that can track and prioritize between multiple simultaneously important subjects instead of collapsing everything to one attention center. That’s the gap between today’s tools and genuinely context-aware reframing, and it’s still an open problem in the published literature.
Try Cropping and Auto-Reframe Without the Learning Curve
Everything above, saliency clustering, LOESS smoothing, chroma-safe offsets, matters if you’re building a pipeline from scratch. Most creators don’t need to build one. Kudoflix gives you the same underlying idea, automated reframing that respects your subject, without touching a command line or waiting on a render queue.
Open a project in the online video editor, drop in your footage, and let auto-reframe generate your first crop pass in seconds.
- Quick auto-reframe presets for vertical, square, and landscape social specs.
- Manual keyframing with easing controls for shots that need a human touch.
- Ready-made templates that match export specs so you’re not guessing at pixel dimensions.
Start your first crop now and see the result before you commit to an export.
Sources
- videocrop — GStreamer documentation
- A Fast Smart-Cropping Method and Dataset for Video Retargeting (ICIP 2021)
- Pan, Zoom, Scan – Time-coherent, Trained Automatic Video Cropping (CVPR 2008)
Recommended