

The fastest workflow for color grading social media clips is four steps: prep your clip and set your aspect ratio, fix exposure and white balance using scopes, apply your creative grade or preset, then export with platform-specific settings. For a fully browser-based path with no software to install, Kudoflix handles all four steps in one place. Before you export anything, check your waveform (skin tones should sit around 70–75% IRE), confirm no highlights are clipping, and verify your output is Rec.709 color space. That’s the whole job.
- Prep: Duplicate your clip, set aspect ratio (9:16 for Reels/Shorts), and load any LUTs or presets you plan to use.
- Technical correction: Fix exposure, white balance, and shot matching first. Use scopes, not your monitor.
- Creative grade: Add contrast curves, color palette, and selective HSL tweaks. Apply LUTs only after correction.
- Export: Use H.265 10-bit when available, or high-quality high-quality H.264 with Rec.709 color space color space.
Table of Contents
- What does a color grading workflow for social clips actually look like?
- Why correct first and grade after — the practical difference for social clips
- Which controls should you adjust first, and how do presets fit in?
- How do you grade a clip entirely in a browser?
- Should you trust your eyes, or use scopes before exporting?
- What are the right export settings for TikTok, Reels, and Shorts?
- Run this checklist before you upload — plus three preset recipes
- Key Takeaways
- The workflow that actually holds up at scale
- Kudoflix makes this workflow faster than any desktop alternative
- Useful sources and further reading
What does a color grading workflow for social clips actually look like?
A repeatable five-step process keeps your feed consistent and your turnaround fast.
Step 1: Prep. Duplicate the original file before touching anything. Set your target aspect ratio — 9:16 for Reels and Shorts, 1:1 for square posts, 16:9 for YouTube horizontal. If you’re repurposing across platforms, keep important action inside the center-safe zone so a 4:3 crop doesn’t cut off a face.
Step 2: Technical correction. This is video color correction, not the fun part, but it’s the most important. Fix exposure first, then white balance. Use your waveform and vectorscope — not your eyes — to confirm the image is balanced. Shot-match any clips that were filmed in different conditions before moving on.

Step 3: Creative grade. Now you add the look. Build an S-curve for contrast, dial in your color palette with HSL controls, and apply a LUT only after the image is technically clean. Applying a LUT to unbalanced footage amplifies existing problems like noise and color casts — always finish correction first.
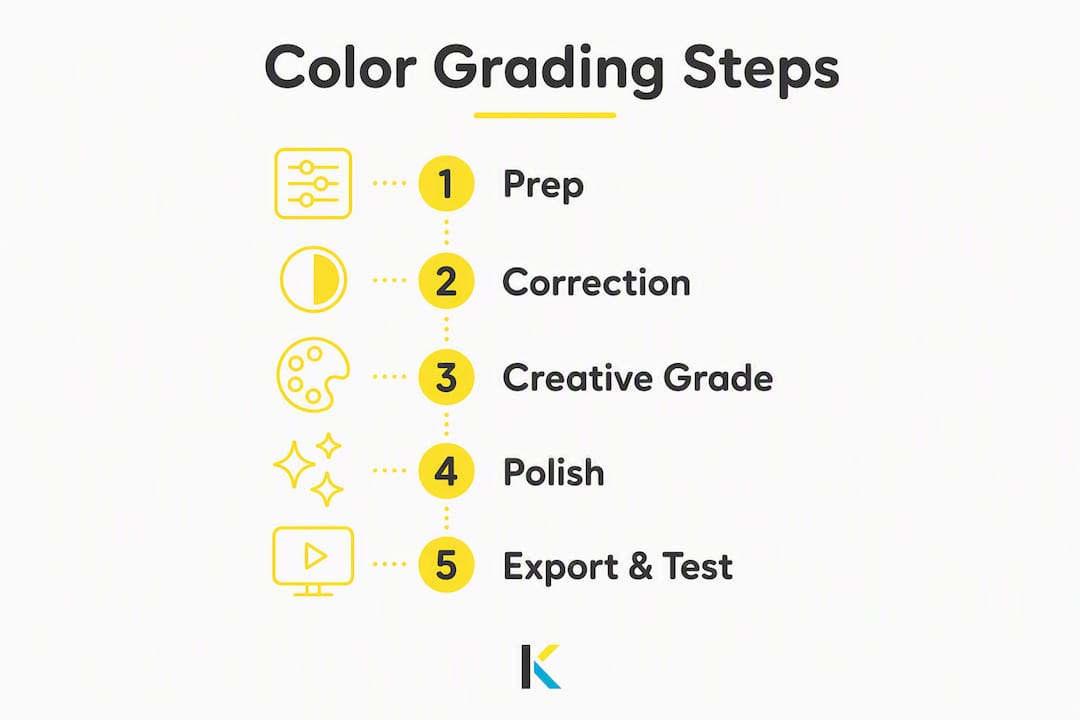
Step 4: Polish. Add light sharpening, reduce noise if needed, and protect skin tones using HSL qualifiers. Keep highlights from clipping.
Step 5: Export and test. Export a short test file, watch it on your phone, and check it inside the actual platform app before publishing. What looks right on a desktop monitor can look washed out or oversaturated on a phone screen.
Pro Tip: Batch similar clips together — same camera, same lighting condition — and apply your correction and grade to all of them at once. A “sandwich” node approach (conversion LUT → clip corrections → creative look) scales efficiently across multiple clips and cuts repetitive work.
Pre-export checklist:
- Scopes checked (waveform, vectorscope, RGB parade)
- Skin tones at 70–75% IRE
- No clipped highlights or crushed shadows
- Correct aspect ratio and crop confirmed
- Test export viewed on phone
Why correct first and grade after — the practical difference for social clips
Color correction and color grading are two different jobs. Correction is technical: fix what’s wrong with the image (exposure, white balance, noise). Grading is creative: add a mood, a palette, a look. The order matters because a creative grade applied to a broken image makes the problems worse, not invisible.
A heavy LUT on an overexposed talking-head clip will push highlights into pure white and make skin look blown out. The same LUT on a properly corrected clip looks exactly as intended.
Here’s how the two jobs differ across common shooting conditions:
| Scenario | Priority correction | Creative grade approach |
|---|---|---|
| Sunlit talking head | Bring highlights down, fix warm color cast | Subtle S-curve, slight desaturation |
| Mixed indoor light | White balance per shot, match shots | Warm or cool palette depending on mood |
| Night / low-light clip | Reduce noise, lift shadows carefully | Deeper blacks, muted midtones |
When to use a preset vs. start from scratch:
- Use a preset when footage is well-exposed and consistently lit — it’s a fast starting point, not a fix.
- Start from scratch when lighting varies between clips, when footage is underexposed, or when skin tones are off. A preset applied to problem footage just locks in the problem.
Which controls should you adjust first, and how do presets fit in?
Five controls do most of the work on short social clips. Learn what each one actually changes, and you’ll stop guessing.
- Exposure / Lift-Gamma-Gain: Exposure sets overall brightness. Lift controls shadows, Gamma controls midtones, Gain controls highlights. Adjust these in that order.
- Temperature / Tint: Temperature shifts the image warm (orange) or cool (blue). Tint corrects green or magenta casts. Fix these before anything else if your white balance is off.
- Contrast / Pivot: Contrast spreads the tonal range. The pivot point determines where midtones sit. For social clips, a modest contrast boost (not aggressive) keeps detail in both shadows and highlights.
- Vibrance / Saturation: Vibrance boosts muted colors while protecting already-saturated ones. Saturation boosts everything equally. Vibrance is almost always the safer choice for skin tones.
- Gamma: Raising gamma brightens midtones without blowing highlights — useful for indoor footage that looks flat.
For social clips, start conservative: small contrast adjustments, moderate vibrance, and leave saturation alone until the image is corrected.
On presets and LUTs: A preset is a fast starting point for well-shot footage. A LUT (Look-Up Table) maps your colors to a target look. Most colorists reduce LUT intensity to 60–80% rather than applying at full strength — full strength often looks artificial on phone screens. A stackable approach (a technical/conversion LUT first, then a creative LUT on top) gives you more control than a single heavy LUT.
Pro Tip: When using an online editor, check whether LUT processing happens locally or in the cloud — cloud-based processing can compress color information differently than a desktop tool, which sometimes affects fine gradients.
How do you grade a clip entirely in a browser?
Browser-based editors remove the biggest friction point for most creators: no download, no render queue, no switching between apps. You upload, grade, preview on your phone, and export — all in one tab.
The practical advantages for social creators:
- No installation means you can grade on any device, including a laptop you don’t own.
- Templates and built-in presets give you a starting look without building from scratch.
- Platform export presets (vertical 9:16, square 1:1) are already configured, so you’re not guessing codec settings.
- Preview is immediate — you can see the result before committing to an export.
The Kudoflix browser workflow:
- Upload your clip directly to the Kudoflix online editor.
- Apply technical correction using the exposure and white balance controls.
- Choose an exclusive color filter or apply a preset from the template library.
- Preview the result and adjust intensity if needed.
- Export using the built-in platform preset for your target channel.
Kudoflix provides templates, color filters, and platform-aware export workflows that cover the full grading and delivery process without leaving the browser. For creators who repurpose content, AI-assisted tools can also automate shot matching and tone adjustments across multiple clips.
Pro Tip: Keep upload file sizes reasonable — most browser editors handle up to 2–4 GB per clip without issues, but very large raw files slow preview. Compress to a high-quality H.264 proxy if your source file is unusually large.
Should you trust your eyes, or use scopes before exporting?
Your monitor lies. Screen brightness, color calibration, and ambient light all affect how you perceive an image. Scopes don’t have those problems.
Three scope checks to run before every export:
- Waveform (luminance): Confirms overall exposure. Skin tones should sit around 70–75% IRE on the waveform. Anything above 100 IRE is clipping; anything below 0 is crushed.
- Vectorscope (hue and saturation): Shows where your colors land. Skin tones of all complexions should fall along the “skin line” — a diagonal axis on the vectorscope. If they’re off that line, your white balance or tint needs adjustment.
- RGB Parade (channel balance): Displays red, green, and blue channels separately. If one channel is significantly higher or lower than the others in a neutral area (gray wall, white shirt), you have a color cast to fix.
60-second scope checklist:
- Open waveform: confirm skin tones at 70–75% IRE, no clipping above 100
- Open vectorscope: confirm skin tones on the skin line
- Open RGB parade: confirm channels are balanced in neutral areas
- Check shadows: no crushing below 0 IRE
Pro Tip: Run scopes on your first clip and your last clip in a batch. If they match, your grade is consistent. If they don’t, find where the drift happened and correct it before exporting the whole set.
What are the right export settings for TikTok, Reels, and Shorts?
Platform transcoding is aggressive. If you export a file that’s already borderline, the platform’s compression will push it over the edge into banding, color shifts, or visible artifacts. Export clean, and the transcode has less to damage.
| Platform | Aspect ratio | Resolution | Codec | Color space |
|---|---|---|---|---|
| Instagram Reels | 9:16 | 9:16 aspect ratio | high-quality H.264 or H.265 10-bit | Rec.709 color space |
| TikTok | 9:16 | 9:16 aspect ratio | high-quality H.264 or H.265 10-bit | Rec.709 color space |
| YouTube Shorts | 9:16 | 9:16 aspect ratio | high-quality H.264 or H.265 10-bit | Rec.709 color space |
| YouTube horizontal | 16:9 | 16:9 aspect ratio | high-quality H.264 or H.265 10-bit | Rec.709 color space |
| Instagram square | 1:1 | 1:1 aspect ratio | high-quality H.264 | Rec.709 color space |
H.265 10-bit delivers higher color fidelity at smaller file sizes than high-quality H.264 when the platform accepts it. For most social uploads, high-quality H.264 with Rec.709 color space color management is the safe default.
Export checklist:
- Color space set to Rec.709 color space (not P3, not log)
- No clipping confirmed in scopes
- Audio levels checked
- Clip length within platform limits (Reels: up to 90 seconds; Shorts: up to 60 seconds; TikTok: up to 10 minutes)
- Test export viewed on phone before final upload
One common mistake: heavy LUT saturation pushes platform transcodes into banding on gradients (sky, skin). If you see banding after upload, reduce LUT intensity to 60–70% and re-export.
For vertical framing guidance and multi-platform repurposing, keep key action inside the center-safe area so a 4:3 crop works without reframing.
Run this checklist before you upload — plus three preset recipes
60-second pre-export checklist:
- Waveform: skin tones at 70–75% IRE, no clipping
- Vectorscope: skin tones on the skin line
- RGB parade: channels balanced in neutral areas
- Aspect ratio and crop confirmed
- Audio levels checked
- Test export watched on phone
Three quick preset recipes:
- Natural: Slight S-curve (gentle lift in shadows, gentle roll-off in highlights), neutral white balance, vibrance +10–15. Use this for talking heads, lifestyle content, and anything where accurate skin tone matters most.
- Punchy: Contrast +20–25, saturation +15, slight shadow crush. Works well for outdoor action clips, food content, and anything shot in good light where you want colors to pop.
- Cinematic: Slightly desaturated midtones, deeper blacks (lift shadows down slightly), warm highlights, cool shadows. Use for narrative content, travel clips, or any short where mood matters more than accuracy.
For all three, apply at 60–80% intensity rather than full strength. Full-strength presets almost always look overdone on a phone screen.
Key Takeaways
Correct before you grade, check scopes before you export, and match your output settings to the platform — those three habits separate consistent creators from ones who wonder why their clips look different after upload.
| Point | Details |
|---|---|
| Correct before grading | Fix exposure and white balance first; applying a creative look to broken footage amplifies the problems. |
| Use scopes, not your monitor | Target skin tones at 70–75% IRE on the waveform; confirm skin hue on the vectorscope skin line. |
| Match export to platform | Use Rec.709 color space color space and H.265 10-bit when available; keep vertical clips at 9:16 for Reels, Shorts, and TikTok. |
| Reduce LUT intensity | Apply presets and LUTs at 60–80% strength to avoid oversaturation and banding after platform transcoding. |
| Kudoflix for browser grading | Kudoflix’s color filters, templates, and platform export presets cover the full workflow without software to install. |
The workflow that actually holds up at scale
Most color grading advice focuses on the creative part — the look, the vibe, the preset. The correction step gets treated as optional, something you do if you have time. That’s backwards. A mediocre creative grade on a technically clean image looks fine. A great creative grade on a poorly corrected image looks like a mistake.
The five-step workflow in this article is worth following not because it’s comprehensive, but because it’s the minimum that actually works. Prep, correct, grade, polish, export. Skip correction and you’re gambling on whether your footage happened to be well-exposed. Skip the scope check and you’re gambling on whether your monitor is calibrated. Most of the time, you lose those bets on a phone screen.
Speed matters for social creators, and the real trade-off isn’t between speed and quality. It’s between doing the correction step quickly (which takes two minutes with scopes) and skipping it entirely (which costs you a re-export). The batch approach — group similar clips, apply correction once, apply the creative look once — is how you maintain a cohesive feed without spending an hour per clip. When a project genuinely needs a professional colorist, that’s a different conversation. For most short-form social content, this workflow is enough.
Kudoflix makes this workflow faster than any desktop alternative
The five-step workflow above works in any editor. In Kudoflix, it takes less time because you never leave the browser. Upload your clip, apply a technical correction, choose from Kudoflix’s exclusive color filters, and export with a platform preset already configured for Reels, Shorts, or TikTok. No render queue. No codec settings to figure out. No switching between apps to preview on your phone.
For creators who want professional-looking results without complex software, Kudoflix’s template library gives you a starting look in seconds, and the built-in export presets handle the Rec.709 color space color space and aspect ratio automatically. The one-minute checklist from this article maps directly to what you can verify inside the editor before you hit export.
Upload a recent clip, apply one of the three preset recipes from this article, run the scope checklist, and export. That’s the whole test.
Useful sources and further reading
- How to Give Your Videos a Filmic Look With Color Grading — practical techniques for cinematic looks
- Best AI Tools For YouTube Shorts (2026) — AI-assisted shot matching and short-form repurposing tools
- Kudoflix social media video formats guide — platform presets and export workflows for 2026
- The Most Engaging Formats According to TikTok, Instagram, and YouTube — aspect ratio and framing guidance by platform
Recommended