A luma fade transition uses brightness values, not opacity, to dissolve one clip into another. Stack two clips, apply a luma key or Gradient Wipe to the top layer, then animate the threshold or transition completion from one extreme to the other. That single move works in Premiere Pro, After Effects, Final Cut Pro, and even Premiere Elements, and it takes most editors under five minutes to set up once they know where the controls live.
TL;DR:
- Manual keyframing of luminance values is less critical than ensuring proper contrast and softness settings in the footage.
- Using preset transitions or adjusting a single softness slider in browser-based editors can produce professional results without complex keyframing.
- Flat or low-contrast footage requires pre-grading with curves or levels to achieve a clean luma fade, regardless of tool choice.
- Overly harsh edges and banding artifacts can be fixed by increasing softness, layering a cross dissolve, or adding grain to mitigate posterization.
- Quick setup methods in tools like Premiere Elements or Final Cut Pro avoid manual keyframing, making the process faster for deadlines or social content.
Table of Contents
- Quick Checklist: Do a Luma Fade Transition Right Now
- How Do You Create a Luma Fade in Premiere Pro?
- Can You Do a Luma Fade in After Effects?
- What About Premiere Elements or Final Cut Pro?
- How Do You Customize a Luma Fade Transition?
- Why Does My Luma Fade Look Wrong?
- How Does Kudoflix Handle Fade-Style Transitions?
- What’s Overrated About the Traditional Luma Fade Workflow?
- Ready to Skip the Keyframe Math?
- Sources
Quick Checklist: Do a Luma Fade Transition Right Now
If you just need the result and don’t care about the theory yet, here’s the fastest route from raw clips to finished fade.
- Stack your clips. Put the outgoing clip on the lower track and the incoming clip on the top track, with approximately a short overlap between them.
- Apply the effect. Drop a Luma Key onto the top clip, or use Gradient Wipe on an adjustment layer above both clips.
- Keyframe the transition. Animate Threshold and Cutoff from 0 to 100 across the overlap, or animate Transition Completion from 100% down to 0%, depending on which effect you picked.
- Soften the edges. Set Transition Softness to a low to moderate percentage, and consider a brief cross dissolve layered underneath to kill any leftover hard lines.
- Preview at full resolution. Scrub through the overlap slowly, check for banding or ghosting, then export a short test clip before committing to the full timeline.
That covers the mechanics. The sections below go deeper for each editor, because the exact menu names and default values differ enough to trip up anyone jumping between apps.
How Do You Create a Luma Fade in Premiere Pro?
Premiere Pro gives you two credible paths to the same result: keying based on luminance, or wiping based on a gradient pattern. Both live inside the Effects panel, and both take about the same amount of setup time.
Timeline prep. Place your two clips on stacked tracks with a moderate overlap. Some editors apply the Luma Key or Gradient Wipe directly to the top clip; others apply the effect on an adjustment layer above both clips, which keeps the original footage untouched if you need to undo later.
Method one: Luma Key. Search for Luma Key in the Effects panel and drag it onto the top clip. In the Effect Controls panel, you’ll see Threshold and Cutoff. Editors typically animate Threshold and Cutoff together, moving from 0 at the start of the overlap to 100 at the end, so the top clip’s brighter areas fade to transparency first, then the darker areas follow. Threshold sets which brightness values start disappearing; Cutoff controls how soft or hard that disappearance looks.
Method two: Gradient Wipe. Apply Gradient Wipe to the top clip or your adjustment layer. Animate Transition Completion from 100% down to 0%, and set Transition Softness to around 15% for a natural falloff instead of a hard line. Toggle Invert Gradient if the fade runs backward from what you expected.
- Layer a short cross dissolve or additive opacity fade at the tail end of the transition to hide any lingering seam.
- Enable motion blur on moving footage so the fade doesn’t look artificially frozen against camera or subject movement.
- Scrub frame by frame through the overlap and watch specifically for hard edges around bright highlights, which usually means Cutoff needs to increase.
Pro Tip: Stagger your Threshold and Cutoff keyframes by a few frames instead of moving them in perfect lockstep. Fstoppers has noted that the professional look comes from fine-tuning rather than the default keyframe positions, and a slight offset between the two parameters gives the fade a more organic, less mechanical feel.
Can You Do a Luma Fade in After Effects?
After Effects trades speed for control. You won’t get a one-click preset, but you’ll get a more precise mask and better handling of tricky footage.
Two approaches work well here. The Extract effect isolates a luminance range and turns it into transparency, similar to Premiere’s Luma Key. Alternatively, you can build a luma-based track matte: duplicate your top layer, desaturate the duplicate, boost its contrast with Levels or Curves, and use it as a luma matte for the layer above it. The track matte route gives you more editing flexibility because you’re manipulating a separate grayscale layer instead of the clip’s actual pixels.
- Animate the Extract effect’s White Point and Black Point, or keyframe Levels on your matte layer, across the overlap duration.
- Ease your keyframes (F9 in After Effects) instead of leaving them linear. Linear luma fades often look mechanical; eased ones feel closer to a real optical dissolve.
- If the footage is flat or low contrast, push Curves or Levels before keying. Flat lighting gives the key almost nothing to grab onto, and tutorials consistently recommend pre-grading contrast before attempting the fade.
- Turn on motion blur for any moving layers, and use frame blending if your footage was retired, so the fade doesn’t stutter.
- Pre-render the transition region before scrubbing through it repeatedly. RAM preview a short section first rather than the whole timeline, since luma-based effects are heavier to calculate than a simple cross dissolve.
What About Premiere Elements or Final Cut Pro?
Not every editor wants to hand key threshold values by hand, and that’s fine. Both of these tools offer a shortcut without sacrificing much quality.
Premiere Elements has a dedicated feature for exactly this. Adobe documents a Guided Edit called Luma Fade Transition that walks you through the whole process step by step, no manual keyframing required. It’s built for editors who want the effect without learning the underlying mechanics.
Final Cut Pro handles this through its Luma Keyer effect. Apple’s own documentation covers how to add and adjust the Luma Keyer, including the threshold-style controls that determine which brightness values become transparent.
- In Final Cut, drop the Luma Keyer onto your top clip from the Effects Browser, then adjust its parameters in the inspector while watching the viewer.
- Guided edits and presets are the right call when you’re on a deadline and the shot doesn’t need a custom look.
- Manual keyframing is worth the extra time when you need to match a specific pace, mood, or footage quirk that a preset can’t anticipate.
- Whichever route you take, adjust softness gradually. A preset’s default softness rarely matches your footage’s contrast level on the first try.
How Do You Customize a Luma Fade Transition?
Once the basic mechanic works, the creative decisions are what separate a generic fade from one that actually serves the story.
Direction matters more than people assume. A dark to light fade tends to feel like a reveal or an awakening, useful for morning scenes or moments of realization. Light to dark reads as closure or descent, which fits endings or somber beats. Invert Gradient (in Gradient Wipe) or reversing your Threshold keyframes controls this instantly.
- Keep softness/feathering in the 10% to 20% range for most footage; push toward 25% to 30% only on already-soft, low-contrast shots where a harder edge would look out of place.
- For social content, a brief transition keeps pace with quick cuts; for cinematic work, a longer transition lets the fade breathe.
- Pair the fade with a slight speed ramp or motion blur on the outgoing clip to mask any remaining edge artifacts.
- Add a light color grade pass right at the transition point. A subtle contrast or exposure shift during the fade can hide seams that pure keying leaves behind.
- On flat footage, temporarily crank contrast just to get a clean key, then dial the grade back afterward so the final image doesn’t look artificially punchy.
Pro Tip: If your footage is naturally low contrast, don’t fight the key settings for twenty minutes. Add a temporary Curves or Levels boost, nail the luma fade, then either remove the boost or blend it into your final grade. It’s faster than hunting for the “perfect” Threshold number on flat footage.
Why Does My Luma Fade Look Wrong?
Most luma fade problems trace back to one of four causes, and each has a fast fix.
- Harsh, digital-looking edges: Increase Transition Softness or Cutoff, and layer a short 3 to 6 frame cross dissolve underneath to smooth the remaining hard line.
- Banding or posterization during the fade: Check your project’s bit depth (8-bit footage bands more easily than 10-bit), add a touch of grain to break up flat gradients, and confirm your export settings aren’t crushing quality.
- Footage too flat to key cleanly: Pre-grade with Curves or Levels to add contrast before applying the luma effect. This is the single most common fix, since luma fades depend entirely on luminance variation to work at all.
- Choppy playback while scrubbing the transition: Pre-render just the overlap region, or drop your preview resolution to a quarter or half while you fine-tune, then switch back to full resolution before exporting.
How Does Kudoflix Handle Fade-Style Transitions?
Manual keyframing gives you precision, but not every project needs that level of control. Kudoflix’s browser-based editor includes a transitions and effects library built for editors who want a polished fade without touching a single keyframe graph.
The workflow mirrors the manual version at a fraction of the setup time: pick a transition template from the library, drop it between your two clips, adjust the softness slider to match your footage’s contrast, then preview and export. No Threshold, Cutoff, or Transition Completion values to hunt down.
- Browse the transitions library for fade-style options that mimic the luminance-driven look without manual keying.
- Adjust softness directly through a slider instead of animating multiple parameters by hand.
- Preview instantly since this editor runs in the browser with no render queue standing between you and the final export.
- Check the example gallery for finished projects that show how template-based transitions hold up in real edits.
This suits creators turning around social clips daily, where five minutes saved per transition adds up fast across a full project.
What’s Overrated About the Traditional Luma Fade Workflow?
The tutorials treat Threshold and Cutoff like they’re the whole story, and that’s where most editors get stuck. The keyframe values matter less than people think. What actually separates a clean luma fade from an amateur-looking one is contrast in the source footage, full stop. You can nail every keyframe perfectly and still get a mushy, low-impact transition if your clips were shot flat.

The conventional advice also underplays how much the softness setting does the heavy lifting. Editors obsess over exact Threshold numbers, then leave Transition Softness at its default and wonder why the edge looks digital.
My honest read: manual keying is worth learning once, so you understand what’s happening under the hood. After that, reach for whatever tool gets you to a good-looking fade fastest, whether that’s a hand-built Gradient Wipe or a template that does the softness math for you. The output is what viewers judge, not the method.
— Mandrixx
Ready to Skip the Keyframe Math?
This editor gives you the luma fade look without the Threshold and Cutoff guesswork. Instead of hand-animating luminance values across a dozen frames, you pick a transition from the library, drag it between your clips, and adjust one softness control until it matches your footage. There’s nothing to install and no render times to wait through between tweaks, since everything runs directly in your browser.
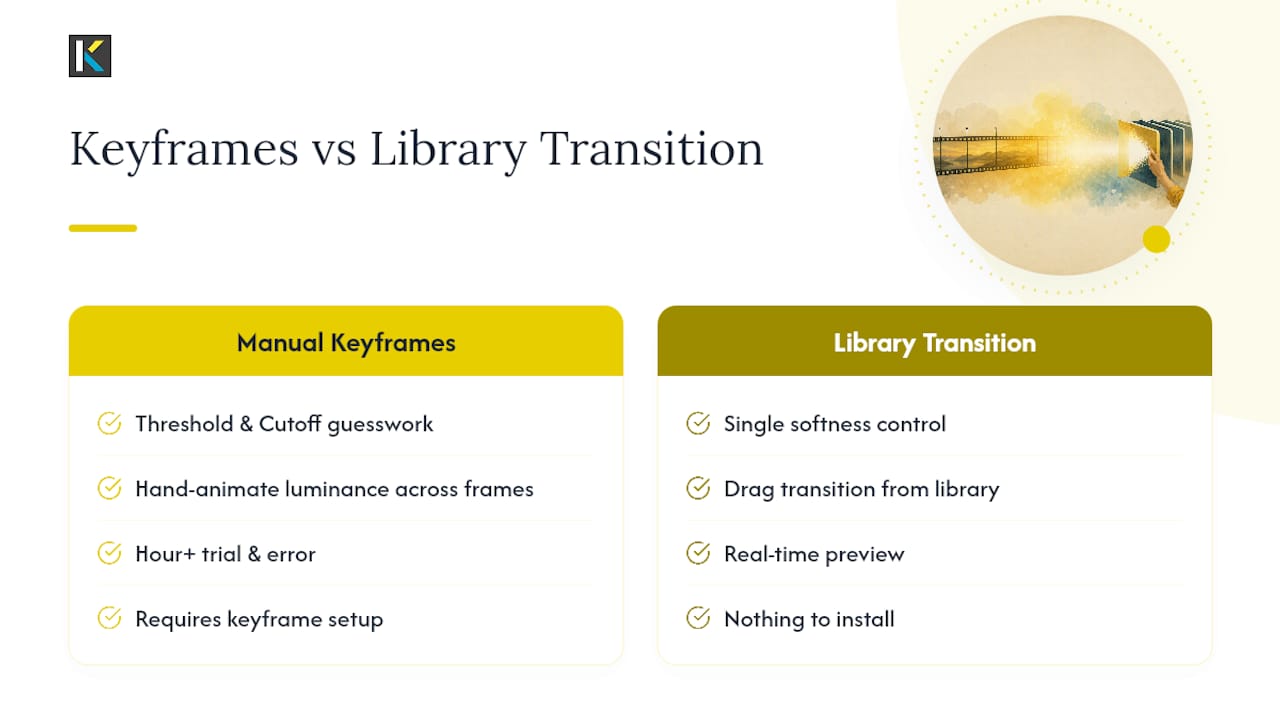
That matters most for creators who need a finished, professional-looking cut today, not after an hour of trial and error with keyframes. Whether you’re cutting a family video, a client presentation, or a batch of social clips on a deadline, the online video editor puts the transition library, adjustable softness, and export right next to each other in one screen. Open a project, drop in a fade transition, and preview the result in real time before you commit.
Sources
- Luma key effects (Cinecom tutorial)
- Luma Fade Transition In Premiere Pro (Videomark)
- A Quick Way to Add Luma Fade Transitions to Your Videos (Fstoppers)
- Create a Luma Fade Transition effect – Guided Edit (Adobe HelpX)
- Use the Luma Keyer effect in Final Cut Pro – Apple Support
Recommended