The fastest reliable way to compress video for web is to re-encode it to H.264 MP4 with a CRF around 23, drop the resolution to 1080p or lower if the source is bigger, and trim the audio bitrate to around 128 kbps. If privacy matters, do it in an in-browser ffmpeg.wasm tool so the file never leaves your device. CRF and bitrate are the two dials that actually control the size-to-quality trade-off.
TL;DR:
- Use H.264 MP4 with CRF 23 and resolution down to 720p for most web videos under 500MB, with audio at 128 kbps for optimal size and quality balance.
- Browser tools are suitable for files under 1GB on recent hardware, but large or long videos benefit from desktop apps or cloud processing to avoid crashes.
- Prioritize codec, bitrate or CRF, resolution, and audio bitrate to minimize quality loss and file size, especially with scene-heavy content or heavy motion.
- Keep original high-quality master files for future re-encoding, as re-compressing already efficient sources can increase file size or reduce quality.
- For privacy and security, in-browser tools prevent file uploads to servers, making them ideal for confidential footage or NDA-sensitive projects.
Table of Contents
- Quick Options: In-Browser Tools, Desktop Apps, and When to Use Each
- The Key Settings That Control Size and Quality
- Practical Presets and Target Sizes for Web Delivery
- What to Expect from Browser-Based Compression
- Troubleshooting and Pro Tips to Avoid Common Pitfalls
- How Kudoflix Approaches Fast, Browser-First Video Work
- Keeping Captions and Subtitles Intact During Compression
- Should You Use HLS or DASH for Compressed Web Video?
- Copyright and Licensing Issues You Can’t Compress Away
- The Real Trade-Off Nobody Talks About Enough
- Kudoflix: A Faster Way to Get to a Web-Ready Video
- Sources
Quick Options: In-Browser Tools, Desktop Apps, and When to Use Each
You have three realistic paths to compress a video for web delivery, and picking the wrong one wastes time you don’t have.
Browser-based tools run entirely on your device using ffmpeg.wasm, a WebAssembly build of the open-source FFmpeg encoder. Nothing uploads to a server, which matters if you’re handling client footage, unreleased product shots, or anything under an NDA. They’re ideal for files under roughly moderate size. Some tools can push toward 1GB if your device has enough RAM and CPU, but performance varies a lot by hardware, and a five-year-old laptop will struggle where a current MacBook won’t.
Desktop apps like HandBrake or the FFmpeg command line are the right call for long 4K footage, multi-file batch jobs, or anything where you need granular control over every encoding parameter. They’re faster because they use native multi-threading instead of a browser sandbox.
Server or cloud compressors make sense when a file is simply too large for local processing, or when you need to compress dozens of videos on a schedule without tying up your own machine.
Here’s the practical breakdown:
- Under 500MB, standard footage: browser tool, no install, no upload
- 500MB to 1GB: browser tool if your device is recent, desktop app if it stalls
- Long-form 4K or RAW footage: desktop app (HandBrake, FFmpeg)
- Batch processing many files: server/cloud tool or a desktop script
If a browser tool freezes or crashes on a big file, that’s not a bug. It’s a memory ceiling. Downsample the resolution first, then try again.
The Key Settings That Control Size and Quality
Four settings do almost all the work: codec, bitrate or CRF, resolution and frame rate, and audio bitrate. Get these right and you’ll cut file size dramatically with almost no visible quality loss.
Codec first. H.264 (inside an MP4 container) remains the safest choice for web delivery because it plays natively in every browser, every phone, and nearly every video player, including VLC, which is worth using to sanity-check your output before you publish it anywhere. HEVC (H.265) compresses better, sometimes shrinking a file by 20% to 75% compared with H.264 at similar quality, but browser and device support is still inconsistent. AV1 and VP9 offer similar efficiency gains and work well on YouTube and modern Chromium browsers, but they’re a gamble for a general audience. If you’re not sure who’s watching, use H.264. Learn more about common video formats and where each one fits.
Bitrate vs. CRF is the choice that trips people up. Bitrate targets a fixed data rate, which is useful when a platform caps upload size. CRF (Constant Rate Factor) targets a quality level and lets the bitrate float scene by scene, which usually produces a better-looking file at a similar size. Lower CRF numbers mean higher quality and bigger files.
As a rough starting point, a balanced setting sits around CRF 23, good for most web use. A strong shrink setting around CRF 28 sacrifices some sharpness for a noticeably smaller file. Treat both as starting points, not rules; scenes with heavy motion need more bitrate than a static talking-head clip.
Beyond that, downscaling resolution (1080p to 720p) and frame rate (60fps to 30fps) often cuts file size more than any codec tweak, and trimming audio bitrate or stripping unused metadata adds a smaller but real saving.
Practical Presets and Target Sizes for Web Delivery
Instead of guessing, work backward from where the video is going.
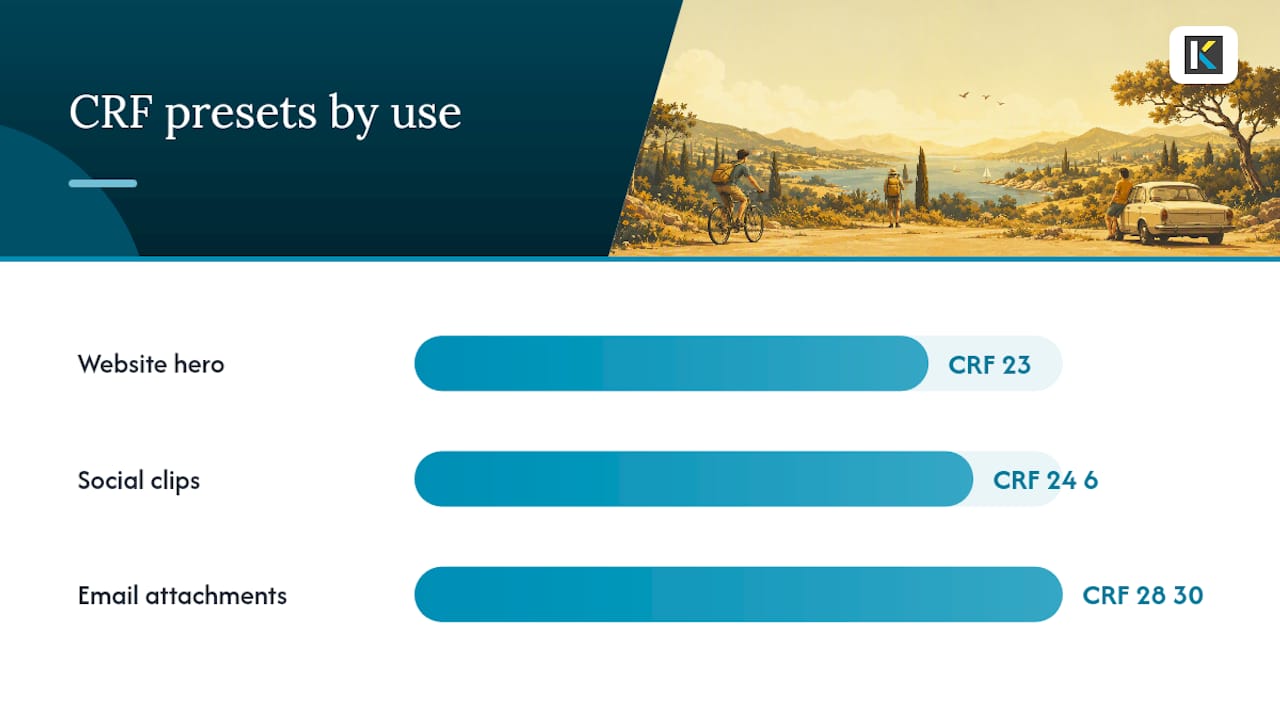
- Embedded on your own website (1080p): CRF 23, H.264, audio at 128 kbps AAC. This keeps quality sharp for a hero video or product demo without bloating page load.
- Social or short vertical clips: CRF 24 to 26, 720p to 1080p, audio at 96 to 128 kbps. Platforms re-compress on upload anyway, so starting from a slightly higher-quality source helps avoid compounded artifacts. If you’re reformatting a widescreen clip, check how to adapt edits for vertical formats before you export.
- Email or messaging attachments: target under 10MB to 25MB depending on the provider’s cap, CRF 28 to 30, audio at 96 kbps, resolution capped at 720p.
To hit a strict size cap, use this formula: (target MB × 8,000) ÷ duration in seconds ≈ total kbps. Subtract your audio bitrate to get the video bitrate, then shave another 10% off as a safety margin, since encoding output rarely lands exactly on target. Aim for a slightly smaller number than the actual limit, not the limit itself.
For output format, MP4/H.264 covers the widest audience. WebM/VP9 can shave off extra size when you know your viewers are on modern browsers, matching what many browser compressors already default to before offering WebM as an option.
What to Expect from Browser-Based Compression
In-browser tools trade some speed for privacy. On a current laptop, expect encoding to run roughly one to three times real time, meaning a five-minute clip might take five to fifteen minutes. Older laptops and most phones will land at the slower end, sometimes considerably slower.
The two limits that matter are RAM and CPU. If a browser tab crashes mid-encode, that’s a memory ceiling, not a broken tool. For anything approaching 1GB or a long 4K file, downsample resolution first or switch to a desktop app.
To confirm a tool truly keeps your file local, open your browser’s developer tools, go to the Network tab, and watch activity while you upload and process a clip. No large outbound transfer means no server round trip, which is the entire point of a no-upload compressor.
Troubleshooting and Pro Tips to Avoid Common Pitfalls
Sometimes a “compressed” file comes out bigger than the original. This usually happens when you re-encode an already efficient HEVC source into H.264 without changing resolution or bitrate, since H.264 needs more data to match the same visual quality. The fix is straightforward: lower the CRF target, downscale the resolution, or accept the smaller efficiency gap and stick with a modest bitrate cut.
Watch for these warning signs and their fixes:
- Blockiness or macroblocking in motion scenes: raise the bitrate or lower the CRF number
- Output larger than input: downscale resolution or switch encoding presets
- Failed or stalled encode: file too large for available RAM, split the task or use a desktop app
- Muddy audio: raise audio bitrate before touching video settings
Pro Tip: *Keep one untouched, high-quality master file and generate every web copy from that master, never from a previous export. Re-compressing a compressed file stacks quality loss on top of quality loss.
How Kudoflix Approaches Fast, Browser-First Video Work
Kudoflix builds its entire editor around the same browser-first logic: no downloads, no installs, and processing that happens fast enough to keep creative momentum going instead of watching a progress bar. The platform’s export presets are built with web and social delivery in mind, so a project you cut and color inside Kudoflix comes out the other side already sized for where it’s going. For readers who want export settings mapped to specific platforms, the YouTube export settings guide walks through presets built for Premiere Pro and DaVinci Resolve users who want the same targets inside a browser workflow.
Keeping Captions and Subtitles Intact During Compression
Compression settings affect video and audio streams, but captions live in a different layer entirely, and that’s exactly where people lose them by accident.
Burned-in captions are pixels, part of the video frame itself, so they’ll survive any compression setting automatically. The risk is legibility: if you compress hard (CRF 28 or higher) at a low resolution, small burned-in text can turn to mush. Test playback at the actual size viewers will see, not full screen on your editing monitor.
Soft subtitles, stored as a separate text track (SRT, VTT, or embedded as a subtitle stream), need more care. Some compression tools strip auxiliary streams by default to save space, silently dropping your caption track in the process. Before you compress, check whether your tool preserves subtitle streams, and always play the final output all the way through with captions turned on.
For web accessibility compliance, a standalone VTT file paired with the HTML5 <track> element is the safest bet, since it’s decoupled entirely from whatever you do to the video file. That way, no matter how aggressively you compress the visual and audio streams, your caption file stays untouched and in sync.
Should You Use HLS or DASH for Compressed Web Video?
A single compressed MP4 works fine for most everyday use: a product demo, a family video, a short social clip. Adaptive streaming only earns its complexity when you’re serving longer content to viewers on unpredictable connections.
HLS (HTTP Live Streaming) and DASH (Dynamic Adaptive Streaming over HTTP) split a video into short segments, typically two to ten seconds each, encoded at multiple quality levels. The player switches between them in real time based on the viewer’s bandwidth, so someone on a train connection gets a lower-bitrate segment automatically instead of a video that buffers and stalls.
Setting this up means running your source through several bitrate/resolution passes (say, 1080p, 720p, and 480p), segmenting each with a tool like FFmpeg, and generating a manifest file (an M3U8 for HLS or an MPD for DASH) that tells the player which segments exist and where to find them.
For a five-minute product video embedded on a landing page, this is overkill. Ordinary progressive MP4 playback with a well-chosen bitrate handles it fine. For a 40-minute webinar recording, an online course, or anything hosted at scale where viewer connections vary widely, adaptive streaming prevents the frustrating stall-and-buffer cycle that drives people to close the tab. Most video hosting platforms (Vimeo, Wistia, and similar services) handle the segmenting automatically once you upload a single compressed master file, so you rarely need to build the HLS or DASH structure by hand.
Copyright and Licensing Issues You Can’t Compress Away
Compressing a video changes its file size, not its ownership. Every legal consideration that applied to the original footage still applies to the compressed copy, and a smaller file size doesn’t reduce your exposure if you don’t have the rights to distribute it.
If you didn’t shoot the footage yourself, confirm you have a license that covers web distribution specifically, not just internal use or a single platform. Stock footage licenses often restrict where and how a clip can be published, and “I compressed it and changed the resolution” doesn’t count as fair use or transformation in any legal sense.
Music is the most common trip wire. A royalty-free track for one platform’s built-in library doesn’t automatically clear you to use it on your own website or in a client project. Check the license terms of every audio track and any footage sourced from outside your own camera roll before you publish.
If you’re compressing and republishing someone else’s video, even a heavily modified version, get written permission or confirm it falls under an explicit open license. Platforms increasingly run automated content matching that flags reused footage regardless of how much you’ve re-encoded or resized it, so compression offers zero legal cover.
The Real Trade-Off Nobody Talks About Enough
Most guides treat compression as a purely technical problem: pick a codec, set a number, done. That’s incomplete. The actual skill is knowing which quality loss your viewer will notice and which they won’t, and that depends entirely on where the video is going.
A viewer watching full screen on a living room TV will spot compression artifacts a phone viewer scrolling past in three seconds never will. That means the “right” CRF value isn’t a universal constant, it’s a judgment call based on your delivery context, and most default presets ignore that distinction entirely.
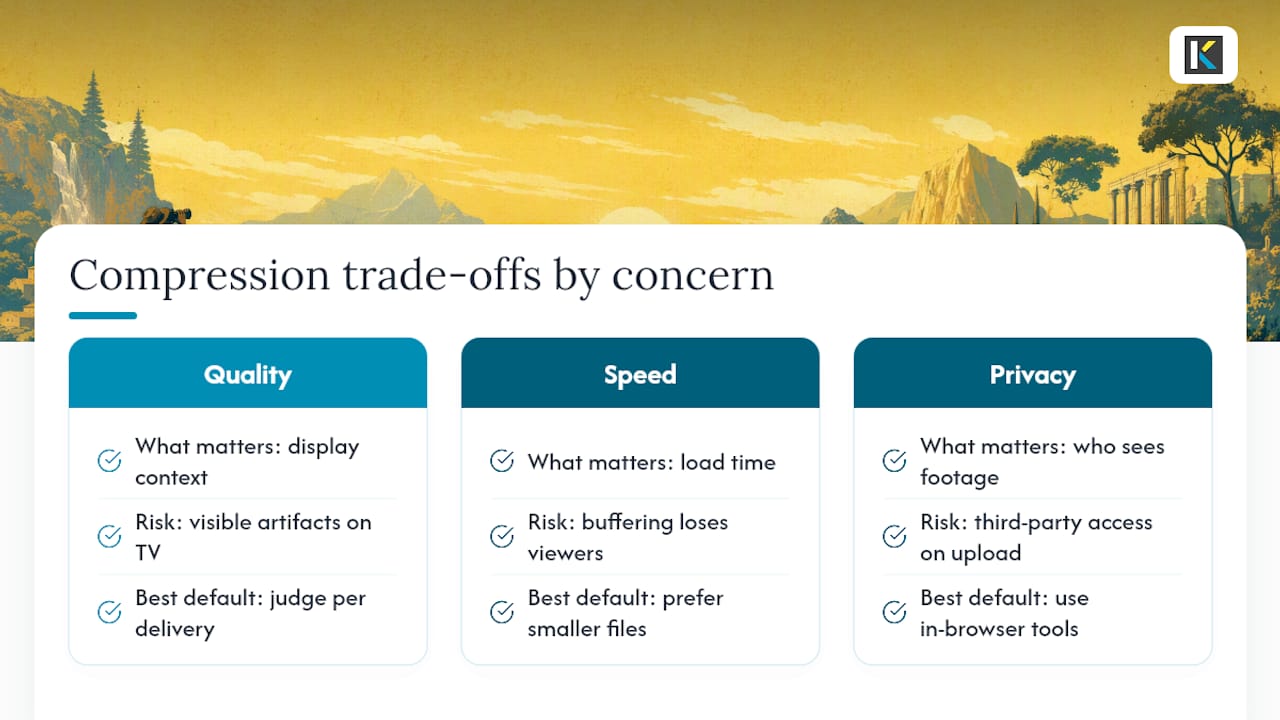
The conventional advice to “just use the highest quality possible” also misses the point. Bigger files mean slower load times, and a video that buffers for eight seconds loses more viewers than one with slightly softer detail in dark scenes. Speed is itself a quality signal, arguably the one that matters most for a first impression, which connects directly to broader site performance work most creators never think to pair with their compression choices.
What deserves more attention than it gets: privacy. Every time you upload raw footage to a server-based compressor, you’re trusting a third party with unreleased content, client footage, or personal video. In-browser tools solve that quietly, and it’s reason enough to default to them whenever the file size allows.
— Mandrixx
Kudoflix: A Faster Way to Get to a Web-Ready Video
Kudoflix skips the export-then-compress dance entirely. Because it’s browser-based with no download or install, you build the video and pick a web-ready export preset in the same place, cutting out the extra round trip of editing somewhere else and then running a separate compression pass. The online video editor handles the resolution, bitrate, and format choices behind a simple preset selector, so you’re not manually tuning CRF values for every project.
What that gets you in practice:
- Templates and transitions built for social and web delivery, not generic broadcast specs
- Export presets that map to common use cases (site embeds, short clips, social formats)
- No file uploads to a separate compression service, since editing and export happen in one place
If you’re tired of juggling an editor, a converter, and a compressor for one five-minute clip, start a project and see how the export presets fit your next upload.
Sources
Recommended