
Non-linear video editing (NLE) is a non-destructive, timeline-based method where your edits are stored as references in an Edit Decision List rather than altering the original media files. The source footage stays untouched on disk; the software reconstructs your cut at playback or export.
Three things that make NLE worth learning right now:
- No generation loss. Every trim and rearrangement points back to the original file, so quality never degrades across multiple saves or re-exports.
- Total timeline flexibility. You can rearrange, shorten, or completely restructure a sequence at any point without starting over.
- Proxy and multitrack workflows. Work with lightweight proxy copies during editing, then swap back to full-resolution media at export — no quality penalty.
Platforms like Kudoflix bring these same mechanics to the browser, so you get the full NLE experience without installing anything.
Table of Contents
- What is non-linear video editing, technically?
- What are the real advantages and limits of NLE?
- How does NLE compare to linear editing?
- Core editing techniques you will use every day
- Step-by-step NLE workflow from import to export
- Which type of NLE software fits your situation?
- How NLE evolved from razor blades to the browser
- Common NLE misconceptions and quick troubleshooting fixes
- How Kudoflix maps to core NLE concepts
- Key Takeaways
- Why proxy workflow is the habit most beginners skip
- Useful sources for going deeper
What is non-linear video editing, technically?
The architecture behind NLE is simpler than it sounds. When you drag a clip onto the timeline, the software does not copy or modify that file. It writes a pointer, a small entry in an Edit Decision List (EDL) or directed acyclic graph, that says “play source file X from timecode 00:01:04 to 00:01:22.” Move the clip, and only the pointer changes. The source file never moves.
That pointer-based model is why scrubbing through a 4K timeline feels instant even when the raw files are enormous. The NLE is reading a playlist of instructions, not re-writing footage.
The three panels you will use every session
Most NLE interfaces are built around three working areas, and knowing them from day one saves a lot of confusion:
- Media browser / library panel — where imported clips, audio, and graphics live before you place them on the timeline.
- Multi-track timeline (sequencer) — the main editing surface; video and audio tracks stack vertically, giving you layering control.
- Preview window — shows the frame at the playhead; most NLEs split this into a source monitor and a program monitor.
When does rendering actually happen?
Rendering is deferred by design. The NLE renders temporary preview files only when playback demands it (for complex effects that the GPU cannot handle in real time) or when you trigger a final export. Those render/cache files are separate from your source media and can be deleted and regenerated at any time without touching the project.
Final export writes a new, self-contained output file. The original clips remain exactly as they were.
Proxy workflows explained
Proxies are low-resolution copies of your source files, usually in a lightweight codec like H.264 or DNxHD, generated at ingest. You edit against the proxies throughout assembly and refinement because they demand far less CPU and storage bandwidth. At export, the NLE relinks to the original full-resolution media and renders the final output at full quality. No edit decisions are lost in the swap.
Pro Tip: Generate proxies at ingest, before you touch the timeline. Trying to create them mid-project, after you have already built a complex sequence, often triggers a relinking step that can temporarily break clip references in some NLEs.
| Concept | What it is | Why it matters |
|---|---|---|
| Edit Decision List (EDL) | A text-based record of edit instructions referencing source timecodes | Enables offline/online workflows and project interchange between NLEs |
| Proxy file | A low-res copy of source media used during editing | Reduces CPU and storage load without affecting final output quality |
| Render/cache file | A temporary file generated for smooth playback of effects | Can be deleted and regenerated; never affects source media |
| Multi-track timeline | Stacked video and audio layers in the sequencer | Allows layering, compositing, and complex audio mixing |
What are the real advantages and limits of NLE?
Why NLE wins for most projects
- Non-destructive edits. Original files are never altered, so you can always recover unused footage from the media browser and try a different cut.
- Random access. Jump to any point in the timeline instantly. Tape required you to shuttle forward and backward in real time.
- Multicam support. Sync multiple camera angles and cut between them in a dedicated multicam viewer, a feature now standard across professional and consumer NLEs.
- Unlimited undo. Most NLEs maintain a deep undo history, letting you step back through dozens of decisions.
- Layering and effects. Stack video tracks, add titles, motion graphics, and color grades all in one project.
Where NLE has real costs
- Hardware demands. High-resolution timelines (4K, 6K, RAW) require fast CPUs, a capable GPU, and NVMe storage. A mid-range laptop will struggle without proxies.
- Storage. Source media, proxies, render files, and project backups multiply quickly. A single 4K project can consume hundreds of gigabytes.
- Learning curve. The interface is deep. Trim tools, color scopes, audio meters, and export settings take time to learn.
- Rendering delays. Complex effects sequences require render passes before smooth playback, which interrupts creative flow on slower machines.
When linear editing still makes sense
Live broadcast switching is the clearest case. A live sports director cutting between eight camera feeds in real time is doing linear work by necessity. Tape-based archival workflows also persist in certain broadcast and institutional contexts where physical media is the preservation format. For everything else, NLE is the right choice.
How does NLE compare to linear editing?
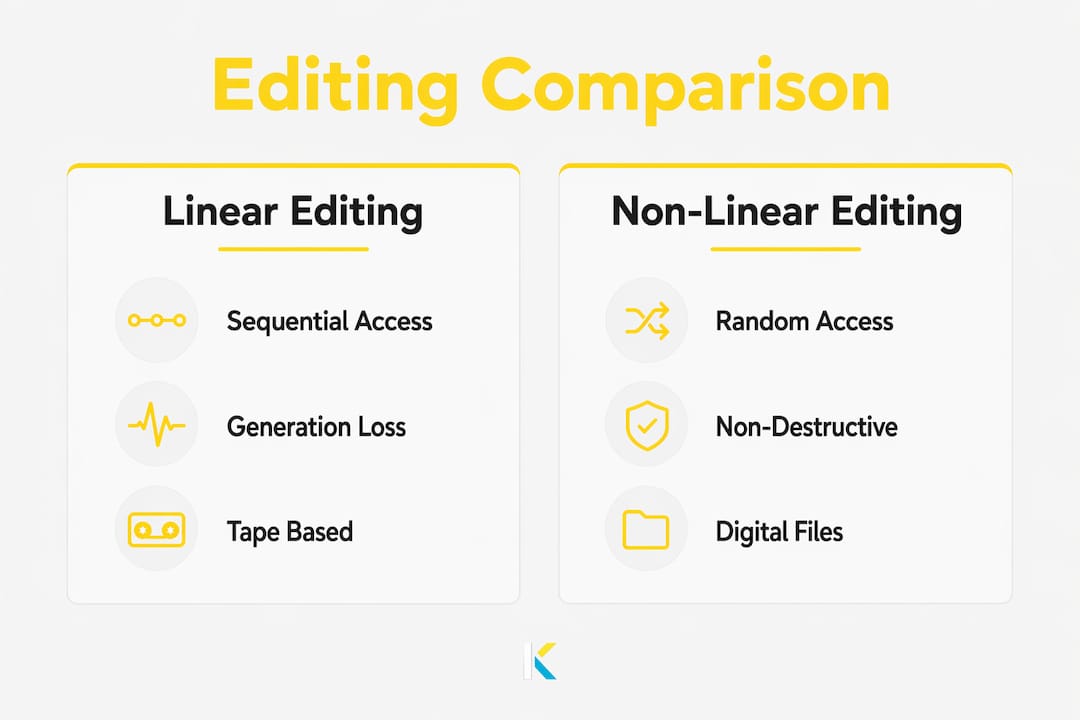
Linear editing meant working with physical tape. You assembled your edit by copying segments from a source tape to a record tape in order, from beginning to end. Change your mind about a shot in the middle? You re-recorded everything from that point forward.
| Dimension | Linear editing | Non-linear editing |
|---|---|---|
| Media access | Sequential (must shuttle to timecode) | Random (instant jump to any frame) |
| Edit method | Destructive (re-records to new tape) | Non-destructive (pointer-based EDL) |
| Generation loss | Yes — each tape-to-tape copy degrades quality | No — original files never re-encoded during editing |
| Rearranging shots | Requires re-recording from the change point | Drag and drop; downstream clips adjust automatically |
| Workflow speed | Slow for complex projects | Fast; effects and trims are near-instant |
| Best use case | Live broadcast switching, tape archival | Virtually all post-production work |
Generation loss in practice: In a tape-to-tape workflow, every time you copied a segment to the record tape, the signal degraded slightly. A third-generation copy looked noticeably softer than the original. NLE eliminates this entirely because the export always reads from the original source file, regardless of how many times you have rearranged the timeline.
For live switching, linear control rooms remain standard. For any project where you will revise, rearrange, or refine, NLE is faster and safer.
Core editing techniques you will use every day
Trim types: what each one does
Understanding the five core trim operations is the fastest way to edit cleanly and keep your timeline in sync.
- Cut/trim (simple): Shortens a clip from its in or out point. Leaves a gap unless you close it manually.
- Ripple edit: Trims a clip and automatically shifts all downstream clips to close the gap. Use this for most assembly work.
- Roll edit: Moves the cut point between two adjacent clips simultaneously, making one longer while the other gets shorter. Total sequence duration stays the same.
- Slip edit: Shifts the in and out points of a clip together without moving it on the timeline. The clip’s position and duration stay fixed; only the content inside it changes.
- Slide edit: Moves a clip left or right on the timeline while automatically adjusting the adjacent clips to compensate. The clip’s own content stays the same.
Pro Tip: Use ripple and roll for pacing work, slip for fixing a bad reaction shot without disrupting timing, and slide when you need to reposition a cutaway without creating gaps. Mixing all five is what separates a clean assembly from a choppy one.
Multicam, keyframes, and audio basics
Timeline manipulation is the backbone of NLE, and multicam editing extends that to multiple synchronized angles. Most NLEs let you sync clips by timecode, audio waveform, or a clap marker, then cut between angles in a dedicated multicam viewer.
Keyframes let you animate any parameter over time: opacity, position, scale, audio volume. Set a keyframe at the start of a clip and another at the end with different values, and the NLE interpolates between them. That is how you build a fade, a push-in, or a volume ramp.
For audio, the multi-track timeline gives you separate control over dialogue, music, and sound effects. Pan, level, and EQ each track independently before mixing down to a stereo or surround output.
Practical fix using trim tools: Say you have a talking-head interview where the subject pauses awkwardly before answering. Use a ripple trim to cut the pause from the video track, then use a roll edit at the cut point to fine-tune the exact frame where the audio transitions. If the reaction shot you placed over the cut now shows the wrong expression, slip it to find a better frame without touching anything else in the sequence.
Step-by-step NLE workflow from import to export
A clean workflow prevents the most common beginner problems: missing media, corrupted projects, and export failures.
- Import and ingest. Bring source files into the media browser. Generate proxies immediately if you are working with high-resolution or RAW footage.
- Organize bins and metadata. Create folders (bins) by shoot day, camera, or scene. Add keywords or markers to clips you know you will use. This step pays off enormously on longer projects.
- Rough cut. Lay clips on the timeline in story order without worrying about precision. Get the structure right first.
- Assembly and trims. Use ripple, roll, slip, and slide to tighten pacing. Cut pauses, fix eyelines, and build rhythm.
- Effects and motion graphics. Add titles, transitions, and composited elements. Render preview files for any effects that drop playback below real time.
- Color grade. Correct exposure and white balance first (primary correction), then apply a look (secondary/creative grade). Use scopes, not just your monitor.
- Audio mix. Balance dialogue, music, and effects. Check levels against a loudness standard (LUFS) appropriate for your delivery platform.
- Render and export. Choose your codec, container, resolution, frame rate, and bitrate based on the delivery target.
Export settings checklist
- Web/social delivery: H.264 or H.265, MP4 container, 1080p or 4K, 8 Mbps–40 Mbps depending on platform.
- Broadcast delivery: ProRes 422 or DNxHD, MOV or MXF container, platform-specified frame rate, loudness at –23 LUFS (EBU R128) or –24 LUFS (ATSC A/85).
- Archival master: ProRes 4444 or lossless codec, maximum resolution, uncompressed audio.
For a deeper look at finishing workflows, the video post-editing guide from Video Production Switzerland covers the full post-production chain in practical detail.
On project hygiene: Save a new versioned project file at the end of every session (ProjectName_v01, v02, and so on). Keep render/cache files in a dedicated subfolder so you can clear them without touching source media. Back up the project file and source media to a separate drive nightly.
File formats worth knowing: For editing, prefer codecs with intraframe compression (ProRes, DNxHD, MJPEG) over interframe codecs (H.264, H.265) because intraframe decodes faster and scrubs more smoothly. For delivery, H.264 and H.265 are the web standards. For archival, lossless or near-lossless codecs preserve quality indefinitely.
Which type of NLE software fits your situation?
The NLE market breaks into five clear categories. Matching the category to your use case saves you from either overpaying for features you will never touch or hitting a ceiling six months in.
| Category | Platform support | Price model | Best for | Key features | Learning curve | System demands |
|---|---|---|---|---|---|---|
| Industry-standard subscription desktop NLE | Windows, macOS | Monthly/annual subscription | Professional film, TV, commercial | Multicam, advanced color, audio mixing, motion graphics integration | Steep | High (fast GPU, ample RAM, NVMe) |
| Free professional desktop NLE | Windows, macOS, Linux | Free (paid Studio tier) | Colorists, indie filmmakers, budget-conscious pros | Full color grading suite, Fairlight audio, Fusion VFX | Steep | High (dedicated GPU strongly recommended) |
| macOS-optimized pro NLE | macOS only | One-time purchase | Mac-based editors, broadcast, documentary | Magnetic timeline, multicam, ProRes native, Final Cut extensions | Moderate | Moderate to high (Apple Silicon optimized) |
| Consumer desktop NLE | Windows, macOS | Free or low one-time cost | Beginners, home video, basic social content | Basic trimming, titles, transitions, simple color | Low | Low |
| Browser/online NLE | Any OS with a modern browser | Free tier or subscription | Social creators, marketers, educators, remote teams | Templates, transitions, export presets, cloud storage | Very low | Minimal (cloud-processed) |
The five major NLE applications that dominate professional and prosumer workflows are Adobe Premiere Pro (industry-standard subscription desktop NLE, Windows and macOS), DaVinci Resolve (free professional desktop NLE with a paid Studio upgrade, Windows, macOS, and Linux), Final Cut Pro (macOS-optimized, one-time purchase), Avid Media Composer (broadcast and film industry standard, Windows and macOS, subscription), and iMovie (free consumer NLE, macOS and iOS only). Each maps to one of the category rows above.
Pro Tip: Match your NLE choice to your delivery target first, then your budget. If you are cutting for YouTube and Instagram, a browser-based or consumer NLE covers everything you need. If you are delivering to a broadcast network, you need a tool that handles MXF, handles offline/online EDL workflows, and meets the network’s technical spec. Buying a professional subscription for social content is like renting a semi-truck to move a studio apartment.
For a broader look at how current video editing trends are shaping tool choices in 2026, Kudoflix’s trends overview is worth a read.
How NLE evolved from razor blades to the browser
The history of video editing is essentially the history of gaining access to any frame, instantly.
- Razor-and-splice era (pre-1960s): Film editors physically cut celluloid and spliced it with tape. Rearranging a sequence meant cutting and re-splicing. Every change was destructive.
- Tape-to-tape linear editing (1960s–1980s): Videotape replaced film for broadcast. Editors assembled edits by dubbing segments from source tapes to a record tape in sequence. Generation loss was an accepted cost of the craft.
- Early computer-based NLEs and EDLs (late 1980s–early 1990s): Systems like the Avid Media Composer (introduced in 1989) digitized footage and stored edits as EDLs. Editors could rearrange shots without re-recording tape. The offline/online workflow emerged: edit at low resolution, export an EDL, then conform the final cut at full quality on a high-end online suite.
- Desktop NLE democratization (1990s–2000s): Falling hard drive costs and faster CPUs brought NLE to standard desktop computers. Software became accessible to independent filmmakers and small production companies.
- Modern cloud and browser editors (2010s–present): Browser-based NLEs moved processing to the cloud, eliminating hardware barriers entirely. Advanced features like multicam and color grading are now available to anyone with a browser and an internet connection.
The through-line is simple: random access storage and pointer-based edits enabled faster experimentation and eliminated generation loss, and each hardware generation pushed that capability further down the cost curve.
Common NLE misconceptions and quick troubleshooting fixes
Three misconceptions beginners carry in
“NLEs are only for professionals.” Not anymore. Modern NLEs have democratized multicam editing, color grading, and motion graphics to the point where a browser-based editor handles them without any installation. The professional tools are more powerful, but the concepts are the same.
“Editing deletes my original footage.” It does not. The non-destructive architecture means your source files are never touched. Every trim only updates the EDL pointer. Unused footage stays in the media browser, available to pull back into the timeline at any time.
“Using proxies will make my final video look worse.” Proxies are a performance tool, not a quality compromise. At export, the NLE relinks to the original full-resolution files and renders from those. The proxy files are discarded. Final output quality is identical to editing directly against the originals.
Three fast troubleshooting fixes
- Missing media (red or offline clips in the timeline): The NLE lost the path to the source file, usually because you moved or renamed it. Use the “Relink Media” or “Reconnect Media” function and point it to the new file location.
- Slow or choppy playback: Render/cache files may be missing or the timeline is too complex for real-time playback. Generate proxy files, lower the playback resolution in the preview window, or render the affected section.
- Unexpected color shifts between clips: Check that all clips share the same color space setting in the project. A mismatch between a Log-encoded clip and a Rec.709 clip will look exactly like this. Set the project color space first, then apply the correct input transform to each clip.
Back up your project file and source media to a separate physical drive at the end of every session. Versioned project files (v01, v02) let you roll back to any earlier state without losing work.
How Kudoflix maps to core NLE concepts
Kudoflix is a browser-based NLE: no download, no installation, no hardware upgrade required. It implements the same foundational NLE mechanics you have read about here, just delivered through a cloud architecture.
Here is how its features map to NLE concepts:
- Non-destructive project files. Your edits in Kudoflix are stored as project data, not as re-encoded video. Original uploads stay intact.
- Timeline-based editing. Clips, audio, and graphics sit on a multi-track timeline you can rearrange freely.
- Templates and transitions. Kudoflix’s library of exclusive templates and transitions functions like a pre-built effects stack, letting you apply polished looks without building them from scratch.
- Export presets. One-click export settings for web, social, and presentation delivery handle codec and resolution choices automatically.
- Cloud storage. Projects and assets live in the cloud, so there are no local storage demands and no risk of losing work to a hard drive failure.
Kudoflix is a strong fit for social creators, marketers, educators, and anyone producing content for YouTube, Instagram, or TikTok who wants professional results without a steep learning curve. You can see the range of outputs it handles on the Kudoflix use cases page. For readers who have been frustrated by bloated desktop software, Kudoflix’s take on why complex software gets in the way is worth reading before you commit to a tool.
Desktop pro tools remain the right choice when you need frame-accurate broadcast delivery, advanced color science workflows, or deep audio post that goes beyond a stereo mix. For everything else, the browser-based category has closed the gap considerably.
[brand_signal] [author_bio]
Key Takeaways
Non-linear video editing stores every edit as a pointer in an EDL, leaving original files untouched and making every trim, rearrangement, and undo instant and lossless.
| Point | Details |
|---|---|
| NLE is non-destructive by design | Edits are stored as EDL references; source files are never altered, so generation loss is eliminated. |
| Use proxies from the start | Generate low-resolution proxy files at ingest to keep editing responsive; the NLE relinks to originals at export. |
| Master five trim types | Ripple, roll, slip, slide, and simple cut cover nearly every pacing and continuity problem you will encounter. |
| Match your NLE to your delivery target | Browser-based NLEs suit social and web content; desktop pro tools are necessary for broadcast and advanced color work. |
| Version and back up every session | Save a new versioned project file nightly and keep source media on a separate drive to prevent unrecoverable loss. |
Why proxy workflow is the habit most beginners skip
Proxy workflow is the single habit that separates editors who enjoy the process from those who spend half their sessions waiting for playback to catch up. Most beginners skip it because it feels like an extra step at the start of a project. It is, but it pays back that time within the first hour of editing.
Consistent bin organization is the other one. A project with clips named “MVI_0034” dumped into a single bin is a project you will dread reopening. Spend five minutes at ingest labeling and sorting, and every subsequent session runs faster.
My concrete recommendation: at the start of every project, create proxies, create a folder structure (Scene/Camera/Day), and save a v01 project file before you make a single cut. That setup takes ten minutes and prevents the most common beginner disasters.
Useful sources for going deeper
- Non-linear editing — Wikipedia: The most thorough technical reference on EDL architecture, generation loss, offline/online workflows, and the history of NLE systems. Start here for the foundational concepts.
- Non-linear video editing — Wikipedia: Covers proxy workflows, codec compatibility, and the technical distinction between NLE and linear tape editing in practical terms.
- Non-linear editing for newcomers — Sadwelkar: A practical, beginner-oriented walkthrough of timeline behavior, rendering, and cache management. Useful for readers who want a step-by-step orientation to the NLE workspace.
- Non-linear editing tutorial — Indie Film Making: Explains the three-panel NLE interface and basic tool locations; good for readers sitting down at an NLE for the first time.
- Complete guide to video editor workflow: A thorough operational guide covering the full editing workflow from ingest to delivery, with practical detail on naming conventions, project structure, and export settings.
Recommended